This is an updated repost of the information presented on April 4, 2008 at the New York Press Association Annual Convention.
While there is no way to "pin" a post, I have set the date to keep this post on the front page for new visitors. Please scroll down to see newer content as it's added.
video, narration, beats by Mark M. Hancock / © DFWmark.com
photos by Mark M. Hancock / © DFWmark.com, The Beaumont Enterprise and/or The Dallas Morning News
If you find the "Quick Tips" version to be visual hot sauce, please watch "Savory Tips to Improve Photos." It's the same presentation with more time to savor each image.
Additional information is located on the All PJ-related posts section of this blog. Underlined topics are linked to previous posts with detailed information about the subject.
Basics:
Read equipment manuals three times.
Have the right equipment for the job.
Know the difference between nouns and verbs.
Pre-consider potential visual problems and solutions.
Photo basics (see below for specifics)
Fill the frame.
Have sharp focus.
Get the right exposure.
Time the images.
Fill the frame:
Get close.
Use long lens.
Crop in camera.
Get wide.
Back away when necessary.
Focus:
Stabilize the camera.
Focus on lead eye.
Adjust plane of focus / angle.
Use depth of field.
Adjust focal length for available light.
When focusing manually, use one finger.
Zone focus.
Exposure:
Zone V.
Hand meter the area.
Use alternative meter techniques: Sunny 16, palm, grass.
Understand the dynamic range.
Timing:
Have patience.
Look for repeated action patterns.
Anticipate the action.
Shoot at apex.
Shoot before collision - wind through reaction.
Get reflective shots (quiet moments)
Seek "timeless" images.
Time of day.
Composition:
Shoot horizontals and verticals.
Start with a clean background.
Have dark corners.
Place subject in background.
Use subject and foreground to cover unwanted elements.
Leave leading space.
Use Rule of Thirds/Fifths.
Build a strong skeletal structure.
Frame items within other items.
Avoid tangents.
Have clean edges.
Lead eyes with light and focus.
Layer the image.
Employ leading lines.
Employ repetition of pattern.
Block corners.
Juxtaposition (harmony / irony)
Where to crop:
Avoid cropping joints.
Contain subject within rectangle (Golden Ratio).
Avoid lights, reflections and voids.
Frame arcs and lines.
Before shooting:
Research stories - find those with emotional elements.
Verify location, access.
Double-check equipment.
Have business cards, pencil and notepad.
Refuse access contracts.
Upon arrival:
Arrive early. Stay late.
Shoot signs and rosters. Collect paperwork. Shoot name tags and numbers.
Shoot basic package: scene, normal, tight
Shoot story: lede, transitions, kicker, emotion.
Get cutline information (5W & H). Get sound if possible.
Selecting subjects:
Hunting techniques: shadows, oblique angle, concealment, pre-compose, pre-focus
Emotion
Activity
Color
Sound
Use attention span limitations.
Goals:
Tell the story.
Get main subjects.
Get emotion.
Shoot 100-frame minimum.
Use each lens.
Shoot each angle (left, right, high, low).
Shoot reflection / refraction.
Shoot silhouette / isolation.
Shoot blur.
Before leaving:
Understand the story.
Be able to tell the story in one frame, three frames, five frames, 20 frames.
Have all cutline information.
Have 100+ images.
Count equipment.
Advanced:
Find new word.
Make unique (rare) images: access, subject, news value, combination.
Multi layers
Multi meaning
Artificial light:
Use flash whenever it's helpful (no light, too slow).
Use flash from 10 a.m. to 4 p.m. outdoors (fill light).
Get flash off the camera.
Understand what causes red-eye.
Try to keep flash angles from 45 to 90 degrees.
Diffuse light.
Color balance artificial light.
Learn to light large areas.
Use multiple lights to add depth.
Be ready to manually calculate exposure (guide number).
Understand inverse square law of light.
Speed techniques (stop action).
Light painting with mixed light and flash (holiday lights, fireworks, lightning).
Increase depth of field with artificial light.
video, narration, beats by Mark M. Hancock / © DFWmark.com
photos by Mark M. Hancock / © DFWmark.com, The Beaumont Enterprise and/or The Dallas Morning News
Do you know your rights as a photojournalist?
Please watch “Know Your Rights as a Citizen Photojournalist.”
Know your rights (most is covered on this link)
It's best to be courteous to defuse confrontations.
Don't be belligerent.
The First Amendment provides the right for anyone to make photos.
Anyone can shoot in public places, streets and sidewalks.
Anyone can shoot where access is granted.
Property owners have the right to deny access.
Understand trespass law by state.
Generally, PJs can shoot until asked to stop.
Exceptions include military facilities and some areas within nuclear plants.
Model releases aren't required for editorial use (but pubs may still require).
Celebrities, politicians and emergency workers limited their right to privacy (injected themselves into spotlight).
Felony criminals have no right to privacy until in prison.
The right to privacy is seriously limited in public places.
The exception to this is medical facilities (which include ambulances in some states).
Business security isn't sufficient to prohibit photography.
Trade secrets aren't in public view. Trade dress doesn't apply to photojournalism.
Police may limit access, but can't prohibit photography (prior restraint).
You aren't required to explain the purpose of your photography.
Coercion and harassment by private security is a criminal offense in all states.
Private parties have limited rights to detain and could face criminal and civil charges.
Without a court order, private parties can't confiscate film.
Ask what law was specifically violated.
Ask for this person's name, and who they represent.
Report rights violations to police. Call before the offender does.
Enough for now,
Showing posts with label basics. Show all posts
Showing posts with label basics. Show all posts
Thursday, August 06, 2026


Sunday, May 26, 2019
iPhonography 101 - Storage

Previously, this iPhonography series discussed the camera and editing images for color balance and tone.
Today, we'll look at how to store the images in the iPhone for quick retrieval through albums and archival safety through downloads and file name conventions.
If there is still storage space on your iPhone, don’t waste
your time looking through the images to delete a few – just save them all. They
often have little details you will need later. They may let you know the who,
what, when, where, why and how of a better image that doesn’t contain the same
information.
I’ve written a post titled, “Take pictures of signs and rosters.” The point is to get additional background information to go with the photos of
value. Don’t delete these until they are saved on a computer or in the cloud.
One day, they may be vital to complete your family story.
In general, I NEVER delete ANY images other than completely
useless shots.
What is completely
useless?
A random palm of the hand or inside of a pocket happens from
not turning the camera app off after a photo. Some images are completely black
or completely white. Some are nothing but blur or grossly out of focus.
If it has ANY use, it isn’t useless.
Library sorting
When it’s time to make images, make images. Don’t sort the
images while you are prepared to make images. Check occasionally to ensure the images
you need were captured. Then, make some more!
As images are made, they’re stored in the iPhone’s library.
These can be sorted later when you have time and nothing interesting to shoot.
If you’re waiting for an oil change or traveling by air, it’s a perfect time to
sort images.
From the Camera App of the iPhone, hit the library box (lower
left corner). The last image will appear.
If it appears with black borders, tap once to show options. If
it appears with white borders and options, tap once to show black borders.
It’s easiest to sort in assess image quality with black
borders, but images can only be favorited and sorted with a white border. Each
person must find their own level of comfort switching back and forth between
the two modes.
Sorting through photos
Open the photo Library. You can start immediately editing by
swiping left and right through the photos. Or, you can jump to different parts
of your Library by selecting “All Photos” and swiping up and down until you
find the area where you want to focus. Tap on a photo icon and start swiping
left and right through those images.
When there is time to sort images, you need a plan. Be
efficient and don’t waste your own time. Choose your Favorites, add those to
folders and stay organized.
Favorite and edit
down
The first edit adds selected images to the Favorites album.
With a photo in full screen, hit the heart button at the
bottom of the screen for any images you like. This will immediately add them in
your “Favorites” folder.
After you’ve made a pass through the entire library, go to
the Favorites folder. Next, compare similar images and select the better of similar
images. Un-heart the lesser of the two. If you change your mind, you can return
and re-heart until you leave the album or put the iPhone in sleep mode.
It’s OK to keep two similar shots as long as you unselected four
others. You can compare those later.
Create albums
Once you’ve selected the best images in your iPhone’s
library, you need to add them to specific albums for easy access. You can make
albums for different categories: cities, subjects, dates, etc.
The image is still located in the same place in your main
library. The Albums streamline your search later. If you have business photos
or photos of your dog that you like to show, the best images are only a few
clicks away.
Open the Library box, tap the screen to switch to the white
selection border on the screen. Click “All Photos” in the top right. Click “Albums”
on the bottom of the screen.
At the top of the Albums page is a + icon. Tap the + to
create a new album. From the pop-up options, select “New Album.” Name the new album
in the pop-up window and hit Save. Continue to create albums for major categories.
Don’t DELETE from
Albums
CAUTION: If you “Delete”
an image from an Album, it DELETES it from your Library. If you no longer want
a photo in an album but want to keep the image, hit the Trash icon, and choose “Remove
from Album” instead of “Delete.” Then, the image remains in your Library rather
than moving to the trash.
Social Media albums
If you manage your own social media, you may want to create
some specific workflow albums. These include:
·
Ready to post (these have been toned and color
corrected enough to post)
·
Future posts (these are either scheduled through
services or held until a specific time)
·
Holidays or specific days (can be long- or short-term
storage for future holidays or events)
As you complete the tasks or posts, you can remove photos from
the albums to stay organized.
Add to Albums
Rather than using the word “Copy” or “Move,” I’ve used the
word “Add.” This is because the photos aren’t copied (duplicated) or moved (physically
relocated) to any albums. There is still only one photo. It’s located in the
Library. However, a link and icon (alias or shortcut) of that photo are added
in as many albums as you choose.
Select from Favorites
Once all appropriate albums are created, click on the Favorites
album. The images you chose before (by hitting the heart icon) should be in
this album now.
Tap the “Select” option in the top-right of the screen. Next,
tap on any photos you want to add to one particular album. A blue circle with a
white check mark will appear on the photo icon. Continue to select all photos
that will move to the same album.
Tap on the photo again to unselect it.
Once all images are selected, tap “Add To” at the
bottom-center of the screen. The “My Albums” page will appear. You’ll also see the
number of images you’re about to move near the top of the screen. Locate the
specific album where you want to add these photos. Tap once on the icon for
that album. You’ll see an animation of the photos being added to the specific
album.
Remove from Favorites
Once an image has been added to another album from the Favorites
album, it should be removed from the Favorites album to stay organized. The
heart icon can be removed from the photo in any album (Camera Roll, Favorites,
or a specific album), and the photo will be removed from the Favorites folder.
Download often
Download images from your phone to your computer frequently
to avoid accidentally deleting images. They’re also far easier to organize on
your computer.
Consider setting up an automatic cloud storage system.
Ensure the images are safely stored in at least one secure location (two is
better) BEFORE deleting an image from your phone.
Make duplicates
Don’t make any changes
to originals that can’t be undone. Once on the computer, you’ll need to copy
images to make any changes to the copied version and leave the original as it
was.
To easily sort through
images that you have worked on, keep those separate from the original files by
placing them in a different folder.
File name conventions
For color-corrected and
other important photos, give them specific names. Start the name with the date
the image was CREATED. Because computers sort differently than we write, here
is the pattern to use: For May 20, 2019 the file name should start 190520
(19=year, 05=month, 20=day).
Then, possibly add a
short term for a group of images. “NOLA” for images made in New Orleans,
Louisiana. Finally, something specific about the image such as “bridge sunset.”
The finished file name would
be “190520 NOLA bridge sunset”
What stays on the
phone?
The biggest advantage of keeping any photo on a phone is
access. Those images are in the device’s memory. They can be referenced quickly
at any time without need of a Wi-Fi or cellular signal.
Your permanent images should be set aside and easy to access
in specific albums. If the image isn’t important enough to set aside, post it
online and store it on your computer.
You should have your folders set up by now. You’ll know
which images you want to have handy forever. Many of your favorite images are
probably also on social media (Facebook, Twitter, etc.). So, you don’t always
need to carry the full-size versions with you.
Delete after saving
When the photos on your phone are safely saved elsewhere (preferably
with a second external-drive backup), it’s time to delete the non-essential
images from your phone. It’s easier to manage a few images rather than an
entire life history.
Once you confirm that the images are safely on your external
hard drive(s), select those images in your iPhone folder and hit delete. Now,
there’s more space for new images.
Tuesday, May 14, 2019
iPhonography 101 – Camera
 |
| Almost all photos and video on my Instagram page and IG business page are made and edited on my iPhone. |
In 2011, I wrote a magazine piece about submitting photos for publication. It addressed the difference between professional cameras and iPhones. All cell phone manufacturers have stepped up their game since then. The difference between cell phone images and professional camera images have narrowed considerably.
Additionally, many newspapers pay a little extra over the assignment fee to get some "atmosphere" cell phone images before a major event to post online. It's enough of an incentive to have a decent cell phone camera and arrive early.
So, let’s address some iPhone basics to maximize the use of the
camera you have in your pocket rather than the camera that’s safely stored in your
closet.
Just the basics
This post is only going to address a basic iPhone (i7 and
below). The information should be useful on most cell phones, but there will be
differences between brands.
I also understand there are many ways to attach cell phones
to other gadgets and vice versa to make them do many beautiful tricks. I have a
closet full of add-on lenses and gadgets too. They’re fun, but I’ll only
address the basic as-is cell phone camera today.
Base Information
All photography composition rules apply to cell phone cameras.
A basic iPhone view roughly equates to a 28mm lens on a 35mm
camera. It’s considered to be a wide-angle of view. “Normal” is 35mm to 50mm on
a 35mm camera system.
This means there will be edge distortion and objects will
appear farther away and smaller than normal on an iPhone. It also means the
depth-of-field will be greater (more things in the photo will appear to be in
focus). You will want to get very close to the main subject if you want it to
dominate the frame.
Shooting Suggestions
This section will cover the basics of how to use the iPhone.
Other brands of cell phones may have more or less of these features. Please
check the user manual or online.
Swipe on lock screen
By the time someone wakes up the camera, unlocks the screen,
finds the camera app and tries to make a photo, the moment is normally over.
Here’s the fastest way to get shooting.
Wake up the camera with the wake/sleep button on the right side
or the home button on the bottom of the screen face. Then, swipe left to open
the camera screen without unlocking the screen.
You’re now ready to shoot without searching for the camera
app.
Use volume as trigger
The two buttons on the left side of the iPhone control
volume. Additionally, either of these buttons function as triggers while in
camera mode. They also work in burst mode (see below).
In low-light situations, it’s best to use these buttons to
minimize camera shake. You may still have rotation if you don’t stabilize the
phone, but it rotates in fewer directions than pushing on the face of the
phone.
To avoid any rotation, you can attach your EarPods
(hardwire) to your iPhone, stabilize the phone (see below) and use the EarPod
volume as a remote trigger. This ensures there is no camera rotation or shake
from user interaction. This feature doesn’t work with AirPods (wireless).
Select focus and
light balance
The iPhone is designed to “average” a scene for focus, color balance and exposure (amount of light included). It will ALWAYS BE WRONG with extreme scenes (white snow, black coal,
monochromatic scenes of most colors, etc.). This can be corrected if you pay
attention while you shoot.
You can select where focus will be by touching that area of
the frame and holding your finger on the phone's screen. A yellow bounding box will appear to let you
know the area where you have chosen for focus and exposure.
Adjust exposure
If the exposure is too light or dark due to the subject
(snow or coal), you can adjust the exposure. When focus and exposure above are
selected, a yellow dot with tiny radiating lines also appears. This is a
sliding exposure scale. Change the exposure of the whole scene by sliding your
finger up and down near the sunshine dot.
AF/AE lock
AF means Auto Focus and AE means Auto Exposure. These can be
locked to a specific distance and exposure.
Choose the distance you want to focus and the exposure you
want and press the screen where focus/exposure should be. The bounding box
mentioned above will appear. Continue to hold until the box becomes larger and
“AF/AE LOCK” appears in a yellow box at the top of the screen. Now, you can
recompose your camera without affecting the focus or exposure.
It will remain locked until you put the screen to sleep or
otherwise leave the camera mode. Every photo you make will be at the same focus
distance, exposure and color balance. If you have an adjustable
color-temperature and lumen desk light, you can easily see the difference it
makes.
Trick color balance
When shooting some monochromatic scenes (detail shots of
roses for instance), the phone will try to “correct” the color of the scene. It
often ruins the entire photo beyond what can be repaired with iPhoto edits.
To avoid this, you can view a “normal toned scene”
(typically something white) with the phone. Then, lock or rapidly recompose the
scene on the desired location and immediately shoot. Both have the same effect
of tricking the camera into using the previous color balance in the new
location.
The major difference between the approaches is focus. If the
AF/AE is locked, the subject needs to be focused at the same distance. If the
rapid recomposition approach is used, the iPhone sets a new focus before
shooting the new scene – however, it won’t have time to change the color
balance to the new scene.
Shoot too many
If your best shot is the last frame, you should have shot
more.
The basic rule is to always shoot three to get one (pro ruleis 10:1 minimum). Something will happen each time photos are made. Shutter lag,
camera shake, subject movement, blinked eyes, wrong exposure, wrong focus, bad
color balance and more can ruin a single frame. It’s best to make several
alternatives to ensure one works.
Hold down for burst
mode
iPhones are notorious for “shutter lag” (the time between
trigger actuation and the camera response). It isn’t a big deal with a photo of
your lunch, but it’s a huge issue with anything involving action.
To give us a fighting chance at a decent shot, the iPhone
has a “burst mode.” This feature makes about 10 frames per second while the
trigger is held down. It doesn’t guarantee that you’ll get a baseball on a bat,
but you can get part of someone blowing out their birthday candles.
The vital part of this feature is selecting which frames to
keep. Before you transfer and delete photos from your phone, you need to select
which images you want to keep from the burst.
Tap the photo in your library. You will see a shadow box at
the top-left of the screen that states, “Burst (7 photos)” or a different
number. At the bottom of the screen, you will see an additional editorial
feature labeled “Select…” Press that option.
You’ll be able to move left and right through the entire
burst sequence. In the bottom-right corner of each photo is a small empty
circle. Press that circle to select the images you want to keep. The circle
will turn blue with a white check mark if it’s selected.
After you have selected images to keep from the burst,
choose “Done” in the upper right-hand corner. It will give you the option to
keep everything or only those selected. If “only selected” is chosen, all
others will be deleted to save memory space.
“Chimp” before
leaving
The term “chimp” means to look at your photos on the viewing
screen after you shoot. While it has a negative connotation, it’s still a good
idea to ensure you have more than one useful shot before you leave a scene (or
eat your meal). Unless you checked each frame with a magnifier before you leave,
you might have a bad surprise when you prepare images later.
Zoom to check focus
When you have a photo from your library displayed on your
screen, you can touch it with your thumb and finger. As you increase the
distance between those to points, the photo will zoom into more detail. As you
decrease the distance between those points, the photo will zoom out to the full
photo.
While you are zoomed in, you can look at the focus to ensure
the image is sharp. If not, shoot it again. Then repeat.
If the shot will be vital, consider carrying a lupe in your
car or bag. This will let you look at the image in minute detail to ensure it’s
useful.
Stability
I’ve written an entire post about eliminating camera shake,
so I won’t go over it again.
However, let’s address how to manage it with a phone that doesn’t have a post hole.
However, let’s address how to manage it with a phone that doesn’t have a post hole.
Love or hate them, everyone has seen “selfie sticks.” These
are basically extra-long arms so more people can fit into a selfie or more of
the background scene can be included in the frame. They are ubiquitous because
they’re cheap.
While I’m too ugly for selfies, I still purchased a cheap,
discontinued one to repurpose it. The part of the selfie stick that holds the
camera also mounts on a tripod (or other ¼-20 screw). It holds the phone in a
stable position while it is attached to any other regular camera mount screw
(including flexpods and clamps).

Top Settings
Across the top of the photo screen are five additional
buttons. The lightning bolt is flash, HDR is for high dynamic range, “live”
records a tiny (.MOV) video rather than a still photo (.jpg), the clock is for
delayed timer, and the triple balls are for different color filtration
variations.
Flash
iPhones have a tiny light next to the camera lens. It’s
typically used in dark forests to search for masked murderers in horror movies
or to find keyholes in the dark by everyone else.
It can also discharge a brighter blast of illumination
(flash of light) for photos in a dark area. It can be turned On, Off or Auto.
Before reaching for the flash, understand color quality is
poor compared to camera flash units. It also can “blow out” (overexpose) parts of a subject or scene.
Leave it “Off” most of the time. The camera is fairly good
in low light for casual uses.
Turn it “On” when you know the scene is too dark OR when the
subject is backlit or in severe sunlight that casts bad shadows.
Use “Auto” while frequently moving from indoors to outdoors.
While it hurts many images, it’s an effective safety net for extreme light
situations.
HDR
HDR means “High Dynamic Range.” It has more stops than the normal 5-stop dynamic range. This setting is used when
you want to add texture to the darkest shadows or the brightest highlights.
For simplicity, let’s say HDR photos are basically several
photos superimposed on each other to utilize the best parts of each. It’s more
complicated, but I don’t want to slow us down.
You will see in the HDR photo that there is detail in both
the highlights and shadows, which wouldn’t be possible with a direct photo.
However, this magic comes with some tradeoffs. For instance,
the contrast tends to be muted. Also, if there is any phone or subject motion
while the camera is recording the frames, there will be “ghosting,” subjects
may appear translucent in several places rather than solid in one place within
the scene.
Timer
The primary purpose of the timer is to let the photographer
frame the image, set the time, and race into the scene to be part of the photo.
It functions fine in this mode as long as the phone is stabilized (on a tripod
or leaning against something immobile).
The secondary use is to avoid camera shake (blur). It’s an
image-saving technique during low-light situations. Camera and/or subject shake
is most likely in low light because it takes longer for the camera to collect
the correct amount of light to make a properly-exposed image.
Choose your scene, stabilize the camera, instead of pressing
the shutter, use the timer on a reasonable time (3 second delay). This ensures
the iPhone isn’t rotating or still vibrating from your touch while the image is
recorded. It’s sharp.
Filter
I’m not a fan of specialty filters. If you’re into
permanently destroying your originals, that’s your choice.
If you desperately want to use software filters on your images, send
the original photo to yourself as an email, save the emailed photo (it will
have a new name now), and apply after-filters to the second image. If you make
images with a permanent filter, there’s no reasonable way to “undo” it.
Monday, December 31, 2018
Quick Tips to Improve Photos Video
video, narration, beats by Mark M. Hancock / © DFWmark.com
photos by Mark M. Hancock / © DFWmark.com, The Beaumont Enterprise and/or The Dallas Morning News
Please watch and share “Quick Tips to Improve Photos.”
The companion "cheat sheet" on this blog is located here: quick-tips-to-improve-your-photos.
This version is visual hot sauce to some. There is a slower version to savor each frame. It's located at "Savory Tips to Improve Photos."
Please share and subscribe to the NewsEagles YouTube channel (it’s free and easy). Please follow this link, sign in to YouTube (or create an account) and hit SUBSCRIBE at www.youtube.com/newseagles
Although I will do some additional work in the future, this is my Magnum Opus.
Enough for now,
Saturday, February 03, 2018
Know Your Rights as a Citizen Photojournalist
video, narration, beats by Mark M. Hancock / © DFWmark.com
photos by Mark M. Hancock / © DFWmark.com, The Beaumont Enterprise and/or The Dallas Morning News
Do you know your rights as a photojournalist?
Please watch “Know Your Rights as a Citizen Photojournalist.”
Please share and subscribe to the NewsEagles YouTube channel (it’s free and easy). Please follow this link, sign in to YouTube (or create an account) and hit SUBSCRIBE at www.youtube.com/newseagles
Enough for now,
photos by Mark M. Hancock / © DFWmark.com, The Beaumont Enterprise and/or The Dallas Morning News
Do you know your rights as a photojournalist?
Please watch “Know Your Rights as a Citizen Photojournalist.”
Please share and subscribe to the NewsEagles YouTube channel (it’s free and easy). Please follow this link, sign in to YouTube (or create an account) and hit SUBSCRIBE at www.youtube.com/newseagles
Enough for now,
Sunday, February 21, 2016
What Is A Photojournalist?
video © Mark M. Hancock / DFWmark.com
photos © Mark M. Hancock, The Beaumont Enterprise or Mark M. Hancock and The Dallas Morning News
This presentation is an updated version of a speech given at the New York Press Association Annual Convention in 2008. This presentation is intended for non-photojournalists and especially students considering photojournalism as a career.
To see more videos, please visit and subscribe to the NewsEagles channel on YouTube. More to come.
Enough for now,
photos © Mark M. Hancock, The Beaumont Enterprise or Mark M. Hancock and The Dallas Morning News
Enough for now,
Friday, April 04, 2008
Quick tips to improve your photos
video, narration, beats by © Mark M. Hancock / DFWmark.com
photos by © Mark M. Hancock / DFWmark.com, © The Beaumont Enterprise and/or © The Dallas Morning News
If you find the "Quick Tips" version to be visual hot sauce, please watch "Savory Tips to Improve Photos." It's the same presentation with more time to savor each image.
Additional information is located on the All PJ-related posts section of this blog. Underlined topics are linked to previous posts with detailed information about the subject.
Basics:
Read equipment manuals three times.
Have the right equipment for the job.
Know the difference between nouns and verbs.
Pre-consider potential visual problems and solutions.
Photo basics (see below for specifics)
Fill the frame.
Have sharp focus.
Get the right exposure.
Time the images.
Fill the frame:
Get close.
Use long lens.
Crop in camera.
Get wide.
Back away when necessary.
Focus:
Stabilize the camera.
Focus on lead eye.
Adjust plane of focus / angle.
Use depth of field.
Adjust focal length for available light.
When focusing manually, use one finger.
Zone focus.
Exposure:
Zone V.
Hand meter the area.
Use alternative meter techniques: Sunny 16, palm, grass.
Understand the dynamic range.
Timing:
Have patience.
Look for repeated action patterns.
Anticipate the action.
Shoot at apex.
Shoot before collision - wind through reaction.
Get reflective shots (quiet moments)
Seek "timeless" images.
Time of day.
Composition:
Shoot horizontals and verticals.
Start with a clean background.
Have dark corners.
Place subject in background.
Use subject and foreground to cover unwanted elements.
Leave leading space.
Use Rule of Thirds/Fifths.
Build a strong skeletal structure.
Frame items within other items.
Avoid tangents.
Have clean edges.
Lead eyes with light and focus.
Layer the image.
Employ leading lines.
Employ repetition of pattern.
Block corners.
Juxtaposition (harmony / irony)
Where to crop:
Avoid cropping joints.
Contain subject within rectangle (Golden Ratio).
Avoid lights, reflections and voids.
Frame arcs and lines.
Before shooting:
Research stories - find those with emotional elements.
Verify location, access.
Double-check equipment.
Have business cards, pencil and notepad.
Refuse access contracts.
Upon arrival:
Arrive early. Stay late.
Shoot signs and rosters. Collect paperwork. Shoot name tags and numbers.
Shoot basic package: scene, normal, tight
Shoot story: lede, transitions, kicker, emotion.
Get cutline information (5W & H). Get sound if possible.
Selecting subjects:
Hunting techniques: shadows, oblique angle, concealment, pre-compose, pre-focus
Emotion
Activity
Color
Sound
Use attention span limitations.
Goals:
Tell the story.
Get main subjects.
Get emotion.
Shoot 100-frame minimum.
Use each lens.
Shoot each angle (left, right, high, low).
Shoot reflection / refraction.
Shoot silhouette / isolation.
Shoot blur.
Before leaving:
Understand the story.
Be able to tell the story in one frame, three frames, five frames, 20 frames.
Have all cutline information.
Have 100+ images.
Count equipment.
Advanced:
Find new word.
Make unique (rare) images: access, subject, news value, combination.
Multi layers
Multi meaning
Artificial light:
Use flash whenever it's helpful (no light, too slow).
Use flash from 10 a.m. to 4 p.m. outdoors (fill light).
Get flash off the camera.
Understand what causes red-eye.
Try to keep flash angles from 45 to 90 degrees.
Diffuse light.
Color balance artificial light.
Learn to light large areas.
Use multiple lights to add depth.
Be ready to manually calculate exposure (guide number).
Understand inverse square law of light.
Speed techniques (stop action).
Light painting with mixed light and flash (holiday lights, fireworks, lightning).
Increase depth of field with artificial light.
video, narration, beats by © Mark M. Hancock / DFWmark.com
photos by © Mark M. Hancock / DFWmark.com, The Beaumont Enterprise and/or The Dallas Morning News
Do you know your rights as a photojournalist?
Please watch “Know Your Rights as a Citizen Photojournalist.”
Know your rights (most is covered on this link)
It's best to be courteous to defuse confrontations.
Don't be belligerent.
The First Amendment provides the right for anyone to make photos.
Anyone can shoot in public places, streets and sidewalks.
Anyone can shoot where access is granted.
Property owners have the right to deny access.
Understand trespass law by state.
Generally, PJs can shoot until asked to stop.
Exceptions include military facilities and some areas within nuclear plants.
Model releases aren't required for editorial use (but pubs may still require).
Celebrities, politicians and emergency workers limited their right to privacy (injected themselves into spotlight).
Felony criminals have no right to privacy until in prison.
The right to privacy is seriously limited in public places.
The exception to this is medical facilities (which include ambulances in some states).
Business security isn't sufficient to prohibit photography.
Trade secrets aren't in public view. Trade dress doesn't apply to photojournalism.
Police may limit access, but can't prohibit photography (prior restraint).
You aren't required to explain the purpose of your photography.
Coercion and harassment by private security is a criminal offense in all states.
Private parties have limited rights to detain and could face criminal and civil charges.
Without a court order, private parties can't confiscate film.
Ask what law was specifically violated.
Ask for this person's name, and who they represent.
Report rights violations to police. Call before the offender does.
Enough for now,
Tuesday, December 18, 2007
Quick tips to shoot holiday lights
This post was written to go with a newspaper story about holiday lights (see the slideshow with examples). Pro shooters may prefer to read How to shoot holiday lights.
These tips are for casual point-and-shoot photographers:
Be patient. The display isn't going anywhere.
Use a tripod or brace the camera on a post or tree.
Turn off or cover the flash.
Use 800 ISO film or digital settings.
Set color balance to tungsten.
Carefully select only what you want to shoot.
Get close enough to entirely fill the frame.
Exclude bright lights (street lamps and most spotlights).
Isolate displays or combinations of lights.
Turn the camera sideways for some shots.
Shoot different angles such as high (on a step stool) and low (on the ground).
If possible, set the camera to bracket exposures or +1 exposure compensation.
If possible, use the self-timer to avoid camera shake.
These tips are for advanced amateur photographers:
Advanced amateurs should follow the general advice above. However, use the lowest possible ISO setting, the most depth-of-field and manually meter the exposure. Use an electronic or manual shutter release cord to avoid camera shake.
The base exposure for most holiday lights is f/5.6 at 1/4th second on 200 ISO. This is also f/22 at 4 seconds on 200 ISO (6 seconds is preferred due to reciprocity failure). This is the same as f/2.8 at 1/60th second on 800 ISO.
Film shooters need to use an 80A tungsten color-correction filter and compensate for light lost (about two stops) or use T-type (tungsten-balanced) film.
Creative effects
Advanced amateurs can introduce additional creative effects to make images shine.
Using the maximum depth-of-field produces a natural streaking of light from point-source lights.
Selective focus when combined with a shallow depth-of-field and close focus creates a stunning effect with a sharp subject and soft circles of light in the background.
Fog refracts point-source lights and adds a nice "glow" to the light. In cold, dry climates, fog can be replicated by breathing on the camera lens immediately before shooting.
Zooming during an exposure creates a Superman-type effect. However, don't zoom more than 1/3rd of the total exposure duration to keep the base image recognizable.
If a camera is equipped for double exposures, many creative options are available.
A popular option is to make one out-of-focus exposure and sharply focus for the second exposure. This creates wide glows around the primary lights. Repetition of pattern can also be accomplished with double exposures. Experiment with them all.
Some photographers have special lenses, which produce unusual images. A rare catadioptric lens uses mirrors to increase focal length. It also creates fun donut shapes with out-of focus lights. Popular and inexpensive Lens Babies allow for focal plane adjustments and very interesting light patterns.
Special effects filters, also called "trick" or "gimmick" filters, change light in various ways. The most popular are starlight filters, which refract and channel point-source light to create long projections from the light. Radiant and multi-parallel filters also work well with lights.
A popular professional technique is using flash with blur. This technique is most often used for portraits. Focus and rear-sync flash exposure are predetermined. A long exposure is selected and the camera is moved until the flash fires. A similar technique is to use a front-curtain flash sync and zoom. Both create unusual images when combined with holiday lights.
Enough for now,
These tips are for casual point-and-shoot photographers:
These tips are for advanced amateur photographers:
Advanced amateurs should follow the general advice above. However, use the lowest possible ISO setting, the most depth-of-field and manually meter the exposure. Use an electronic or manual shutter release cord to avoid camera shake.
Creative effects
Advanced amateurs can introduce additional creative effects to make images shine.
A popular option is to make one out-of-focus exposure and sharply focus for the second exposure. This creates wide glows around the primary lights. Repetition of pattern can also be accomplished with double exposures. Experiment with them all.
Enough for now,
Sunday, April 01, 2007
What's an ISO?
ISO is the call name for International Organization for Standardization, which determines the numerical equivalencies for film sensitivity to light among other commercial standards.
Film speed standards are described by ISO 5800:1987 (they charge a fee for the document). The ISO ratings took the place of ASA ratings in America and DIN ratings in Europe. In practical terms, it's the same number as the ASA ratings.
Basically, a lower ISO number means a film requires more light to create a properly-exposed latent image on film. Some specialized films have deliberately low ISOs to record very bright lights (a welding torch for instance) or light over a very long period of time. Other specialized films only record particular sections of the electromgnetic spectrum (light).
Digital cameras have an ISO rating for sensor light sensitivity as well. It's described by ISO 12232:2006. However, it's based on a previous determination of the quality of the image capture based on digital noise as opposed to actual sensitivity (reaction time) of the sensor.
While some camera makers still don't conform to the minimum, most other camera makers have surpassed the minimum threshold. However, they continue to use the same ISO settings to make it simpler for the public.
In other words, digital images may one day surpass the quality available with 25ISO film, but would still be rated as 200 because there are few legitimate reasons to make sensors slower. Likewise, 3200ISO digital images may surpass the quality of 200ISO film. However, the camera settings are more understandable at 3200ISO rather than something labeled "High Speed 200ISO-D."
In general, consumer films with lower ISOs use a finer (silver halide) grain structure than high-speed films. This translates into clearer-looking images because the grains are smaller.
For most PJs, the goal is to use the lowest possible ISO for the light available. This produces the finest quality image. It also produces images which can withstand enlargement and/or crops without a loss of quality.
To get around this limitation (crops & enlargements), many pro photographers use larger film formats to allow the grain structure of faster films to be less invasive to the total image area. In other words, a larger sheet of film recording the same scene can withstand more cropping and/or enlargement before it starts to fall apart.
The only real "creative" effects capable with a film's ISO are at the grain-structure level. Many of these effects can be enhanced by deliberately underexposing and pushing film (to make the grain larger and more dense to create higher contrast) or pulling film to do the opposite.
Otherwise, PJs can exploit the properties of light with lower speed films and capture long exposures on slower film or combining powerful flash with available light in an unusual way. However, the same could be done by simply adding (matching) neutral density filters to a lens with any speed film.
Likewise, PJs can use higher ISO films to create more contrast in a scene. However, the faster films come with a larger grain structure and loss of quality. But, some people like it anyway.
On the low end, there are specialized "portrait" and "very low contrast" films, which are primarily used by wedding and portrait photographerswhodathunk.
Many pro shooters like to cross process film. This is deliberately processing negative films in positive chemistry (E-6) or positive films in negative chemistry (C-41).
Likewise, color film is relatively intolerant of temperature variations. This can be used to create unusual effects with film by deliberately processing the film in chemistry at an incorrect temperature.
For both of these "alternative processes," a lot of experimentation is required to nail a consistent combination of exposures and chemistry to create the desired results. It's important to only change one variable at a time when developing an alternative film process. Otherwise, PJs are never sure which variable created desired results.
Finally, this isn't suggested unless a PJ is desperate for something new, film is subject to heat and breaks down over time. Deliberately warming or holding film for an unusually long time causes the film color to shift. Both of these are considered "faults" of the film - unless, of course, this is done deliberately and in a controlled manner.
Then, the process can be replicated because a single variable was introduced and recorded. Once the process can be replicated, the PJ can resolve issues to exploit the nature of the color shift.
Another way to play with shutter speed is to use photographic paper instead of film. The sensitivity of photographic paper varies by brand. PJs can test to find the right exposure combination, but somewhere between an ISO rating of five to 10 should be about right.
Jonathon Keats has an interesting project at the Hotel des Arts in San Francisco. Using low-speed paper and a pinhole camera, he's making a 100-year photo of a hotel room. Mind you, someone could go in there with high-power strobe and really mess up the results, but it's a novel project.
We'll save the discussion about types and qualities of film for another day.
Enough for now,
Film speed standards are described by ISO 5800:1987 (they charge a fee for the document). The ISO ratings took the place of ASA ratings in America and DIN ratings in Europe. In practical terms, it's the same number as the ASA ratings.
Basically, a lower ISO number means a film requires more light to create a properly-exposed latent image on film. Some specialized films have deliberately low ISOs to record very bright lights (a welding torch for instance) or light over a very long period of time. Other specialized films only record particular sections of the electromgnetic spectrum (light).
Digital cameras have an ISO rating for sensor light sensitivity as well. It's described by ISO 12232:2006. However, it's based on a previous determination of the quality of the image capture based on digital noise as opposed to actual sensitivity (reaction time) of the sensor.
While some camera makers still don't conform to the minimum, most other camera makers have surpassed the minimum threshold. However, they continue to use the same ISO settings to make it simpler for the public.
In other words, digital images may one day surpass the quality available with 25ISO film, but would still be rated as 200 because there are few legitimate reasons to make sensors slower. Likewise, 3200ISO digital images may surpass the quality of 200ISO film. However, the camera settings are more understandable at 3200ISO rather than something labeled "High Speed 200ISO-D."
In general, consumer films with lower ISOs use a finer (silver halide) grain structure than high-speed films. This translates into clearer-looking images because the grains are smaller.
For most PJs, the goal is to use the lowest possible ISO for the light available. This produces the finest quality image. It also produces images which can withstand enlargement and/or crops without a loss of quality.
To get around this limitation (crops & enlargements), many pro photographers use larger film formats to allow the grain structure of faster films to be less invasive to the total image area. In other words, a larger sheet of film recording the same scene can withstand more cropping and/or enlargement before it starts to fall apart.
The only real "creative" effects capable with a film's ISO are at the grain-structure level. Many of these effects can be enhanced by deliberately underexposing and pushing film (to make the grain larger and more dense to create higher contrast) or pulling film to do the opposite.
Otherwise, PJs can exploit the properties of light with lower speed films and capture long exposures on slower film or combining powerful flash with available light in an unusual way. However, the same could be done by simply adding (matching) neutral density filters
to a lens with any speed film.Likewise, PJs can use higher ISO films to create more contrast in a scene. However, the faster films come with a larger grain structure and loss of quality. But, some people like it anyway.
On the low end, there are specialized "portrait" and "very low contrast" films, which are primarily used by wedding and portrait photographers
Many pro shooters like to cross process film. This is deliberately processing negative films in positive chemistry (E-6) or positive films in negative chemistry (C-41).
Likewise, color film is relatively intolerant of temperature variations. This can be used to create unusual effects with film by deliberately processing the film in chemistry at an incorrect temperature.
For both of these "alternative processes," a lot of experimentation is required to nail a consistent combination of exposures and chemistry to create the desired results. It's important to only change one variable at a time when developing an alternative film process. Otherwise, PJs are never sure which variable created desired results.
Finally, this isn't suggested unless a PJ is desperate for something new, film is subject to heat and breaks down over time. Deliberately warming or holding film for an unusually long time causes the film color to shift. Both of these are considered "faults" of the film - unless, of course, this is done deliberately and in a controlled manner.
Then, the process can be replicated because a single variable was introduced and recorded. Once the process can be replicated, the PJ can resolve issues to exploit the nature of the color shift.
Another way to play with shutter speed is to use photographic paper instead of film. The sensitivity of photographic paper varies by brand. PJs can test to find the right exposure combination, but somewhere between an ISO rating of five to 10 should be about right.
Jonathon Keats has an interesting project at the Hotel des Arts in San Francisco. Using low-speed paper and a pinhole camera, he's making a 100-year photo of a hotel room. Mind you, someone could go in there with high-power strobe and really mess up the results, but it's a novel project.
We'll save the discussion about types and qualities of film for another day.
Enough for now,
Thursday, October 19, 2006
Primary education photo lesson plan
Last time, we discussed some basic understandings teachers of children should address before starting a photo class.
This post should establish some standard operating procedures for the class as well as a logical "Intro to Photo" lesson plan for at least one semester.
Digital photography is encouraged
Digital photography (dry lab) eliminates the time limitations of many exposure problems as well as processing and printing. The learning curve is immediate because students can see failures on the LCD screen and continue working until they solve the problem. Although pre-press techniques (cropping, color correction, etc.) should be introduced, image procurement, delivery and volume can be much higher with digital photography.
For photo-chemical courses (wet lab), processing and printing absorb the majority of the student's time and/or delay students' learning time. Students can't know the film couldn't handle low light until they get an envelope of black images a few days later or find blank negatives after 30 minutes of loading, processing (and probably chemically burning) the film by hand.
Both film and digital processes teach students valuable lessons. While digital photography (particularly "chimping") allows students to bypass particular basic photography lessons, it allows them to immediately express their vision with satisfactory results. They'll repeat mistakes, but they're only wasting their own time.
Film forces students to learn techniques or continue to fail. This approach teaches correct exposure approaches better, but can be extremely disappointing and discouraging for less-motivated students.
Reasonable work load
For an introductory digital photo course, I don't think it's unreasonable for any student to produce, edit and digitally deliver six images per assignment. If wet lab techniques are also taught, one to three prints per assignment is reasonable.
Wet lab time restrictions make students want to edit their own images. It can take beginners about 30 minutes to make one proper resin-coated print. Few students want to spend three hours in the lab when they could be shooting. So, they'll pick an image or two, crank them out and they're done.
Digital delivery makes students do the opposite. They want to deliver everything. However, six images of a duck in a swimming pool tells as much of the story as 20 images.
Teachers don't need to wade through a sea of similar images to find the best ones. This is the student's job. The students must select only the best images to learn to differentiate between "best" and "average."
Minimum shots
It's wise to assign a minimum number of shots. A common roll of film is 36 exposures. It would be fair to require a minimum of one full 36-exposure roll of film. Likewise, it's fair to require 50 digital images.
This minimum pushes the students to shoot more than one photo of a subject. It encourages them to explore shape, composition, juxtaposition, light angle and so forth. When combined with a subject minimum (four subjects should work), students acquire enough variety to select a decent set of images.
By setting both a shooting minimum (number of frames shot) and a delivery range (minimum and maximum), the students are forced to edit their own work and critique themselves first.
Critique
The students should push themselves and each other through constructive critique to make better images.
In the beginning, teacher critiques should concentrate on the basics: exposure, focus and timing. If young students' images fall somewhere within an acceptable range on these basics, they did well.
If something goes drastically wrong with these core issues, it's best to discuss the equipment problem with the entire class so everyone can learn.
Otherwise, it's best to avoid "talking down" images for beginners. Instead, find the best image examples and explain what works in the images.
It's important to involve the students in the critique. They need to be able to analyze the images and assess what is successful and what fails. It may require polling the class by student, but open format critique is the standard practice.
Rebuttal
It's common to want to defend one's work. So, it's important to let students know they must be silent while their work is critiqued. This makes them listen to the good and bad about their work without escalating and compounding pre-existing personality conflicts.
After the critique of their work, they get to defend their work and also get the final word about their work. If a critique is unjust to them, they can correct the record before the critique moves to the next set of images.
Award slips
One way to involve shy students in the critique is to have them award slips of paper by category. If using a cork board, students pin up the images. Then, they initial their category award slips and pin them next to the images they feel deserve the awards, but they can't vote on their own images.
Images without awards are removed from the board. The remainder of the class is spent discussing the reasons why students bestowed the awards. They aren't defending their own work, but defending the work of their classmates. This results in a much more positive experience since most folks are sensitive about their images at first.
Good starting award categories are:
Universal image problems
Throughout any basic photography course, universal problems will arise. There are common ground issues as well as camera shake and many other beginner-level problems. These must be addressed as they appear in students' images.
I've written posts for most universal problems. They're included in the "All PJ-related posts" section of this blog. Although most of the posts are designed for working pros, there should be useful information for teachers in the list.
Grading guidelines
Since the eventual goal of this instruction is photojournalism, deadlines are the single most important factor in grading. This should be strongly emphasized. Images must be delivered in the proper format by the proper time to get a satisfactory grade.
Aside from deadlines, I believe it's most important for students to try hard. Therefore grading should be about objective factors rather than subjective results. Students will be rewarded or punished for subjective issues during critique. That's enough punishment or praise.
The following factors could determine a course grade from an objective standpoint:
Ultra-basic photo
Most photo classes make assignments which involve some level of failure. It's not a failure on the part of the student, but a failure of the equipment. Thus, the student learns the limitations of the equipment. The really smart students quickly find ways around these problems.
These assignments concentrate on one mechanical limitation while provoking student problem solving and discussion. The subject matter is left to students' imaginations.
For introductory photo courses, it's best to introduce the photographic limitations as well as techniques to handle the limitation. Often, instructors select successful images from professionals to illustrate the concepts and give a presentation about how to create successful images for the assignment. Then, they allow the students a week to work on the problem.
Some common beginning assignments include:
What's next?
I encourage teachers to dedicate significant time to each lesson so the knowledge can seep into students' brains. Consider these assignments as the alphabet of photography. Once the students learn how to handle these, then they can move on to understanding visual verbs and storytelling.
Enough for now,
This post should establish some standard operating procedures for the class as well as a logical "Intro to Photo" lesson plan for at least one semester.
Digital photography is encouraged
Digital photography (dry lab) eliminates the time limitations of many exposure problems as well as processing and printing. The learning curve is immediate because students can see failures on the LCD screen and continue working until they solve the problem. Although pre-press techniques (cropping, color correction, etc.) should be introduced, image procurement, delivery and volume can be much higher with digital photography.
For photo-chemical courses (wet lab), processing and printing absorb the majority of the student's time and/or delay students' learning time. Students can't know the film couldn't handle low light until they get an envelope of black images a few days later or find blank negatives after 30 minutes of loading, processing (and probably chemically burning) the film by hand.
Both film and digital processes teach students valuable lessons. While digital photography (particularly "chimping") allows students to bypass particular basic photography lessons, it allows them to immediately express their vision with satisfactory results. They'll repeat mistakes, but they're only wasting their own time.
Film forces students to learn techniques or continue to fail. This approach teaches correct exposure approaches better, but can be extremely disappointing and discouraging for less-motivated students.
Reasonable work load
For an introductory digital photo course, I don't think it's unreasonable for any student to produce, edit and digitally deliver six images per assignment. If wet lab techniques are also taught, one to three prints per assignment is reasonable.
Wet lab time restrictions make students want to edit their own images. It can take beginners about 30 minutes to make one proper resin-coated print. Few students want to spend three hours in the lab when they could be shooting. So, they'll pick an image or two, crank them out and they're done.
Digital delivery makes students do the opposite. They want to deliver everything. However, six images of a duck in a swimming pool tells as much of the story as 20 images.
Teachers don't need to wade through a sea of similar images to find the best ones. This is the student's job. The students must select only the best images to learn to differentiate between "best" and "average."
Minimum shots
It's wise to assign a minimum number of shots. A common roll of film is 36 exposures. It would be fair to require a minimum of one full 36-exposure roll of film. Likewise, it's fair to require 50 digital images.
This minimum pushes the students to shoot more than one photo of a subject. It encourages them to explore shape, composition, juxtaposition, light angle and so forth. When combined with a subject minimum (four subjects should work), students acquire enough variety to select a decent set of images.
By setting both a shooting minimum (number of frames shot) and a delivery range (minimum and maximum), the students are forced to edit their own work and critique themselves first.
Critique
The students should push themselves and each other through constructive critique to make better images.
In the beginning, teacher critiques should concentrate on the basics: exposure, focus and timing. If young students' images fall somewhere within an acceptable range on these basics, they did well.
If something goes drastically wrong with these core issues, it's best to discuss the equipment problem with the entire class so everyone can learn.
Otherwise, it's best to avoid "talking down" images for beginners. Instead, find the best image examples and explain what works in the images.
It's important to involve the students in the critique. They need to be able to analyze the images and assess what is successful and what fails. It may require polling the class by student, but open format critique is the standard practice.
Rebuttal
It's common to want to defend one's work. So, it's important to let students know they must be silent while their work is critiqued. This makes them listen to the good and bad about their work without escalating and compounding pre-existing personality conflicts.
After the critique of their work, they get to defend their work and also get the final word about their work. If a critique is unjust to them, they can correct the record before the critique moves to the next set of images.
Award slips
One way to involve shy students in the critique is to have them award slips of paper by category. If using a cork board, students pin up the images. Then, they initial their category award slips and pin them next to the images they feel deserve the awards, but they can't vote on their own images.
Images without awards are removed from the board. The remainder of the class is spent discussing the reasons why students bestowed the awards. They aren't defending their own work, but defending the work of their classmates. This results in a much more positive experience since most folks are sensitive about their images at first.
Good starting award categories are:
Best photo
Best timing
Best framing
Most humorous
Most serious
Most artful (or creative)
Rarest (most difficult to acquire)
Universal image problems
Throughout any basic photography course, universal problems will arise. There are common ground issues as well as camera shake and many other beginner-level problems. These must be addressed as they appear in students' images.
I've written posts for most universal problems. They're included in the "All PJ-related posts" section of this blog. Although most of the posts are designed for working pros, there should be useful information for teachers in the list.
Grading guidelines
Since the eventual goal of this instruction is photojournalism, deadlines are the single most important factor in grading. This should be strongly emphasized. Images must be delivered in the proper format by the proper time to get a satisfactory grade.
Aside from deadlines, I believe it's most important for students to try hard. Therefore grading should be about objective factors rather than subjective results. Students will be rewarded or punished for subjective issues during critique. That's enough punishment or praise.
The following factors could determine a course grade from an objective standpoint:
30 pts - Deadline met
20 pts - Minimum number of images shot
20 pts - Minimum number of images turned in
10 pts - Assignment shot as directed
10 pts - Images properly exposed (excluding special assignments)
10 pts - Critique participation
Ultra-basic photo
Most photo classes make assignments which involve some level of failure. It's not a failure on the part of the student, but a failure of the equipment. Thus, the student learns the limitations of the equipment. The really smart students quickly find ways around these problems.
These assignments concentrate on one mechanical limitation while provoking student problem solving and discussion. The subject matter is left to students' imaginations.
For introductory photo courses, it's best to introduce the photographic limitations as well as techniques to handle the limitation. Often, instructors select successful images from professionals to illustrate the concepts and give a presentation about how to create successful images for the assignment. Then, they allow the students a week to work on the problem.
Some common beginning assignments include:
Shapes - have students collect one image of each major geometric shape.
Motion - teaches panning, blur (virtual volume) and stop action.
Light and shadow - this often throws details off both ends of the dynamic range.
High key / Low key - all white / all black. The camera will over and under expose. If there is some way to compensate for this on the camera, teach students the correction techniques first to avoid mass failure. Otherwise, this is simply a mass failure assignment to let them all know photography is trickier than it looks.
Same place at different times of day - this teaches about quality of light.
Same subject wide and long - this teaches about lens compression and relative position.
Close up - for point-and-shoot cameras this teaches where the focus will fail.
Light direction - left & right side light, front and back light to teach depth with light.
Types of light - have students shoot sunlight, cloudy, open shade, tungsten, fluorescent, halogen, sodium vapor to learn how the camera records different light colors.
2D - 3D - flat subjects that appear 3-dimensional. The principle is to show how tonal shading changes the textural appearance of flat objects. A good example is a wet or polished slab of marble. It is a really difficult assignment to convey to students.
Basic portrait - this is slightly more than mug shot. Both hands of the subject must be visible in the frame.
Scene - this is another hard one. This is a prep assignment for environmental portraiture. Students find a place where a portrait could be made. Once completed, have the kids print the image and move different-sized coins or ovals through the scene to see where they could put people's heads to achieve clean backgrounds without having tangents.
Environmental portrait - this combines the two previous assignments.
Self portrait - if camera allows it.
What's next?
I encourage teachers to dedicate significant time to each lesson so the knowledge can seep into students' brains. Consider these assignments as the alphabet of photography. Once the students learn how to handle these, then they can move on to understanding visual verbs and storytelling.
Enough for now,
Tuesday, October 17, 2006
Primary educator's intro to PJ
Recently a few elementary and middle school teachers asked for help with lesson plans for introduction to photojournalism (PJ) classes. Personally, I think this is like asking children to repair a diesel fuel injector before they master riding a bicycle, but I'm probably underestimating some kids' abilities.
I should also mention that I'm probably too blunt for most primary school teachers' sensibilities. My only baby has interchangeable lenses. So, I'll hope professional educators soften the tone between what I write in this series and its eventual audience. :-)
General intro
There is a progression to PJ. It involves a mastery of photography (evidentiary), documentary and finally photojournalism. Most beginning assignments tend to result in evidentiary images. It's a good place to start, but it's only the first step if PJ is the desired goal.
A logical class design would teach students about the equipment, working with people, writing cutlines, basic event coverage and finally story telling.
I always suggest it's wise to include "basic photography" in introductory photojournalism classes. It teaches the students to use the camera as a tool for their vision. It also teaches the abilities and limitations of the camera so they can refine their vision.
Photojournalism - like journalism - looks easy, but it takes a lot of training and mistakes to get it right. PJs must understand how to be a journalist and a photographer as well as post-production (publication applications) and media law.
Setting ground rules
First and foremost, teachers need to protect themselves legally. With the world being as crazy as it's become, teachers need to be absolutely certain students understand what are "inappropriate" photo subjects.
A common beginning assignment could be for students to document their day. Part of most 3rd-graders' days is bath time. It could be their most or least favorite part of the day. They may wish to document it. However, when they turn in a photo of their bath time, it's placed onto a school computer and has an entirely different meaning.
Consequently, bath time should be strictly off limits. If they want to show their little brother brushing his teeth while fully clothed, it's OK. But, draw this line early and don't allow anyone to cross it.
Legal issues
As soon as a student has a camera in hand, legal issues arise. The camera is an instrument of freedom of speech and legal limitations. By including photography in a class setting, teachers must determine how much responsibility they're willing to accept.
Since this post is designed for primary and secondary teachers, it's probably best to tell the students and their parents that they're responsible for all their own actions. It's also best to inform them that the school is NOT willing to defend their freedom of speech or press rights. This keeps the teacher from having an unnecessary confrontation with parents, fellow teachers, a principal, school board members, a district attorney, etc. (and losing the battle as well as possibly a job).
Without delving too deep, the kiddos need to understand that if they do happen upon something scandalous, they won't get to publish it. Yes, it's newsworthy. Yes, it's a matter of freedom of speech and press, but they're in a controlled environment.
Juveniles have varying human rights. It's not fair, but it's a fact. Depending on the circumstances, law centers and other defenders will step up to protect children's rights (speech and press). But, don't count on it.
Prior restraint is alive and well for students (of all ages) in educational institutions.
What are the boundaries?
Again, I'm not going to digress into court case minutia of privacy, trespass, intrusion, false light or any of the other legal issues. I'm also going to hope these classes aren't taking place in a combat or other crisis zone.
These are some safe, broad boundaries to keep the kids and teachers out of trouble.
1) Establish who can and can't be photographed. This has become customary in the last decade or so in most school districts. If the district requires parental approval for photographs, then only those children with signed releases on file can be photographed. No exceptions.
Any student without a release shouldn't be in a PJ class. They can work in the office during photo time. If kids really want to be photographed or be in the class, tell them to get their parents to sign the school district release.
2) Establish what is "public" for the students. This is different than the professional level because the students are actually in the facility more time. Generally acceptable rules for students might include the photo classroom, hallways, cafeteria, playground and gymnasium or auditorium. Other areas such as gardens or libraries can be determined as needed.
Off limits areas would be other classrooms, offices and "private areas" (particularly health services).
3) Set off-campus shooting area limits. The general rule is anyone can shoot from a public place. Students may not understand a mall is a private business. This needs to be properly explained.
It's safe to limit photography to places the student lives, is invited to attend (friends' homes) and public facilities (parks, recreation centers and private vehicle commutes). In general, let the children know that if they don't see anyone else with cameras (excluding pro shooters), it's probably off limits.
Equipment
Whenever possible, it's best to have all the students use the same style of camera. This makes critiques uniform and keeps the children from facing awkward/hateful conflicts from the kid whose parents own the universe.
For introductory classes, point-and-shoot digital or single-use 35mm film cameras are probably best. Single lens reflex cameras are best reserved for high school and beyond.
If film cameras are used, make sure there is some fair way to pay for the cameras, film, developing and printing. Poor kids deserve to express their vision as much as rich kids.
If the children must take turns sharing equipment, set firm, fair rules. How long does each student get to use the camera? What happens if the camera is left at home, stolen or breaks? Where and how are the cameras to be stored when not in use?
Don't freak out
Well-intentioned teachers want their students to be happy and use all their senses and abilities. After reading the cautions above, they might re-think their decision to teach photography.
Don't worry, as long as these rules are understood and enforced, everything should go fine.
The next few sections of this series are about making assignments and letting the students find their vision. From here onward, it's the fun stuff.
Enough for now,
I should also mention that I'm probably too blunt for most primary school teachers' sensibilities. My only baby has interchangeable lenses. So, I'll hope professional educators soften the tone between what I write in this series and its eventual audience. :-)
General intro
There is a progression to PJ. It involves a mastery of photography (evidentiary), documentary and finally photojournalism. Most beginning assignments tend to result in evidentiary images. It's a good place to start, but it's only the first step if PJ is the desired goal.
A logical class design would teach students about the equipment, working with people, writing cutlines, basic event coverage and finally story telling.
I always suggest it's wise to include "basic photography" in introductory photojournalism classes. It teaches the students to use the camera as a tool for their vision. It also teaches the abilities and limitations of the camera so they can refine their vision.
Photojournalism - like journalism - looks easy, but it takes a lot of training and mistakes to get it right. PJs must understand how to be a journalist and a photographer as well as post-production (publication applications) and media law.
Setting ground rules
First and foremost, teachers need to protect themselves legally. With the world being as crazy as it's become, teachers need to be absolutely certain students understand what are "inappropriate" photo subjects.
A common beginning assignment could be for students to document their day. Part of most 3rd-graders' days is bath time. It could be their most or least favorite part of the day. They may wish to document it. However, when they turn in a photo of their bath time, it's placed onto a school computer and has an entirely different meaning.
Consequently, bath time should be strictly off limits. If they want to show their little brother brushing his teeth while fully clothed, it's OK. But, draw this line early and don't allow anyone to cross it.
Legal issues
As soon as a student has a camera in hand, legal issues arise. The camera is an instrument of freedom of speech and legal limitations. By including photography in a class setting, teachers must determine how much responsibility they're willing to accept.
Since this post is designed for primary and secondary teachers, it's probably best to tell the students and their parents that they're responsible for all their own actions. It's also best to inform them that the school is NOT willing to defend their freedom of speech or press rights. This keeps the teacher from having an unnecessary confrontation with parents, fellow teachers, a principal, school board members, a district attorney, etc. (and losing the battle as well as possibly a job).
Without delving too deep, the kiddos need to understand that if they do happen upon something scandalous, they won't get to publish it. Yes, it's newsworthy. Yes, it's a matter of freedom of speech and press, but they're in a controlled environment.
Juveniles have varying human rights. It's not fair, but it's a fact. Depending on the circumstances, law centers and other defenders will step up to protect children's rights (speech and press). But, don't count on it.
Prior restraint is alive and well for students (of all ages) in educational institutions.
What are the boundaries?
Again, I'm not going to digress into court case minutia of privacy, trespass, intrusion, false light or any of the other legal issues. I'm also going to hope these classes aren't taking place in a combat or other crisis zone.
These are some safe, broad boundaries to keep the kids and teachers out of trouble.
1) Establish who can and can't be photographed. This has become customary in the last decade or so in most school districts. If the district requires parental approval for photographs, then only those children with signed releases on file can be photographed. No exceptions.
Any student without a release shouldn't be in a PJ class. They can work in the office during photo time. If kids really want to be photographed or be in the class, tell them to get their parents to sign the school district release.
2) Establish what is "public" for the students. This is different than the professional level because the students are actually in the facility more time. Generally acceptable rules for students might include the photo classroom, hallways, cafeteria, playground and gymnasium or auditorium. Other areas such as gardens or libraries can be determined as needed.
Off limits areas would be other classrooms, offices and "private areas" (particularly health services).
3) Set off-campus shooting area limits. The general rule is anyone can shoot from a public place. Students may not understand a mall is a private business. This needs to be properly explained.
It's safe to limit photography to places the student lives, is invited to attend (friends' homes) and public facilities (parks, recreation centers and private vehicle commutes). In general, let the children know that if they don't see anyone else with cameras (excluding pro shooters), it's probably off limits.
Equipment
Whenever possible, it's best to have all the students use the same style of camera. This makes critiques uniform and keeps the children from facing awkward/hateful conflicts from the kid whose parents own the universe.
For introductory classes, point-and-shoot digital or single-use 35mm film cameras are probably best. Single lens reflex cameras are best reserved for high school and beyond.
If film cameras are used, make sure there is some fair way to pay for the cameras, film, developing and printing. Poor kids deserve to express their vision as much as rich kids.
If the children must take turns sharing equipment, set firm, fair rules. How long does each student get to use the camera? What happens if the camera is left at home, stolen or breaks? Where and how are the cameras to be stored when not in use?
Don't freak out
Well-intentioned teachers want their students to be happy and use all their senses and abilities. After reading the cautions above, they might re-think their decision to teach photography.
Don't worry, as long as these rules are understood and enforced, everything should go fine.
The next few sections of this series are about making assignments and letting the students find their vision. From here onward, it's the fun stuff.
Enough for now,
Monday, August 28, 2006
Consider commercial photography
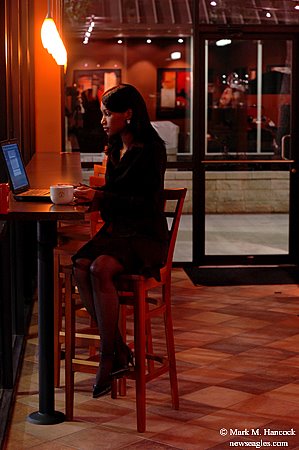
Commercial photo by © Mark M. Hancock for Sertinos Cafe
Ed note: this post is about a subject that is NOT photojournalism. It's actually the exact opposite. Some PJs, particularly freelancers, accept commercial gigs to help pay the bills and stay in the biz without starving. Others finance their more ambitious journalistic endeavors with income earned from commercial gigs. Staffers should check with their employers to know company policies BEFORE considering freelance commercial gigs.
Most people understand the difference between television news and television commercials. Most people also understand the difference between editorial photojournalism and advertising.
As TV ads are called commercials, the photography used in print advertising is called commercial photography. The point of commercial photography is to increase commerce by selling products and/or brand recognition.
Often, this is accomplished by simply showing the product in flattering light. Occasionally this is done by showing something other than the product. Drug manufacturers often employ flowers, waterfalls, meadows, etc. rather than a photo of a pill or box of pills.
More recently, this trend has included sports-related products. Often, a subtle placement of the company's logo is all that distinguishes an ad from an editorial photo. Oh yeah, and the fact that the image is absolutely perfect - the light, the placement of elements, the colors, the layers, etc.
In other words, it's fiction.
Elements couldn't possibly exist as harmoniously as they appear in commercial photographs. As long as everyone knows the images are fiction, it's OK.
Why hire PJs for commercial shoots?
I don't do many commercial shoots. However, when it won't conflict with my newspaper work, I like to accept the challenge and enjoy the creative license.
High-end commercial shooters are worth every penny when it comes to large, product-based national ads. These shooters have hugely expensive equipment and lighting expertise for delicate, complicated projects.
However, regional and even some national accounts have turned to PJs since the digital convergence began in the late 1990s.
The reasons for this shift vary. Obviously, PJs are slightly less expensive because our overhead is much less than large commercial studios. Also, PJs are renown for our speed from call to delivery. PJs, who accept last-minute commercial gigs, can literally get a call in the morning, arrange the location and models, and deliver pre-pressed, absolute-released (model and property released) digital images around the globe within a few hours.
Additionally, commercial photographers tend to congregate in large, industrial cities. Consequently, PJs in more rural settings are often the best qualified professionals for hundreds of miles.
All this aside, PJs have a major edge over traditional commercial photographers particularly when a client needs to tell a story. PJs are story tellers. We've seen how this applies to wedding photography, but advertisers are starting to apply this talent to commercial applications as well.
Tell a fiction story
As mentioned above, commercial photography is fiction. It's not a large step for a journalist to write a fiction story. After all, journalists tell stories every day. They understand dialog, pacing and all the other elements of a good story (factual or fiction).
The same holds true for PJs. PJs can tell stories for any client. Although most of us prefer to tell honest, factual stories for newspaper and magazine readers, sometimes it's fun to tell a fictional story for a commercial client. This is precisely why they go the extra mile to hire PJs - to tell a story about their product.
Often advertising stories are rather two-dimensional (no pun intended), some superficial characters (actors) meet for lunch at a place (typically the client's) and have a laugh or toast some fictitious milestone.
Other stories actually get to tell a deeper story (although not too deep). The story might be about a hard-working co-ed softball team challenging the city champions, winning and enjoying their favorite beverage at some local hangout.
The previous example sounds simple enough to most PJs. We've shot the real thing over and over. So, we know what typically happens. We could easily tell actors how to behave to mimic (or perfect) our best shots from the real versions of most of these stories.
Idealistic PJs probably just started squirming. Remember these images are for a commercial client (i.e. fiction). If we don't make the images, someone else will. Either way, someone is earning a few grand for the shoot. Breathe, it's NOT news.
Unlike the reality we've shot so many times, we get to select the players, the field, the time of day, where they are arranged, etc. The only thing we probably don't choose is which beverage they choose for their celebration.
The product for this shoot is probably the beverage. However, depending on our contract, we might be able to swing secondary sales with the uniforms they wear (sponsors), the local hangout or even the vehicle they use to move from one place to another.
Extremely high-dollar clients won't allow piggy-back work on the shoot. However, if we give smaller clients a break, they actually prefer the arrangement. Not only do they save on the initial shoot/model fees, their product may be seen in another ad. It's a win/win for smaller clients.
From the shooter's point of view, it's better to glean $2K each from four clients simultaneously than $4K from one client. It creates a little more back-end work (after the shoot delivery), but it's works out amicably for everyone.
How to approach a commercial gig
Unlike news PJ, commercial photos rarely have cutlines or a narrative. Typically, the images are expected to tell their own story and allow the viewer to imagine themselves in the place of the models.
Consequently, it's easiest to think of a commercial shoots as stills from a movie. Frequently, the photographer is also the artistic director of this mini-movie, but sometimes the client employs an art director to handle the shoot.
We can talk more about art directors some other day. For brevity, we'll consider this a shoot for a local client and the PJ must deliver everything for the client (this makes it more fun for us).
When the photographer talks with the client, it's important to learn the exact expectations of the client. Otherwise, the client won't be happy with the final results. Our main concern on commercial gigs is to make the client happy and deliver exactly what they want.
If they want two guys shaking hands in front of a sign and they're willing to pay $4K to get it, that's exactly what they'll get by golly.
If they are open to letting the photographer have creative latitude, it can become a guilty pleasure for PJs. It becomes more work for the same pay, but it's a chance for the photographer to shine.
Develop the story
If the client leaves the details to the photographer, it's good to offer some suggested shots or develop a story line for the client. This allows the client to refine or reject ideas before it's too late.
Get specific requirements from the client while talking and write them all down. Clear up any potential problem issues during this discussion. For example, it's difficult to make motorcycles burn underwater. It can be done, but the cost is significant.
When shooting, be certain every requirement is met. Since this is a commercial shoot, there are no excuses. The camel (or whatever) must do exactly what's required because the commercial photographer can make it keep doing the same thing over and over and over until the image is perfect. Always remember there's typically thousands (or millions) of advertising dollars being spent on the back end of this deal.
When the client is considering an entire brochure, campaign or booklet, the photographer can often suggest a story line. Offer an extremely detailed story line to avoid client confusion. This requires the photographer to provide answers to the common journalistic questions (who, what, when, where, why and how).
Unlike a news story, all these factors are the responsibility of the photographer. So be careful with the details (hint: don't suggest using a pumpkin motif in April). It's also important to discuss precise demographics of the models (age, gender and ethnicity).
If the client leaves model selection to the photographer, lean heavily toward attractive models with middle-gray reflectivity skin tones and confusing ethnicity. It makes metering easier and these models tend to be neutral enough to make everyone happy.
Before we proceed, understand logic and logistics don't apply in commercial photography. Tell the story and ignore logic. Commercial clients and their customers are happy with an illogical lifestyle. As they say, sell the sizzle - not the steak.
Know the story line
It's important for everyone to understand the story line. The commercial photographer, the client and all models must understand the story to make everyone happy.
Here's a quick story line example useful for a country inn:
A couple arrives for their blissful anniversary vacation at this inn. They breathe in the fresh air in the morning light outside the inn. Inside, they're greeted by a friendly and attractive desk clerk. Their bags are carried to their room by an attractive bellhop.
The couple sees the room and all its lush features (detail shots). The couple has a great lunch. They are served perfect meals (more detail shots).
After lunch, they lounge in a hammock by the lake at sunset (remember logic doesn't apply). Then, he plays golf with his handsome friends (don't ask where they came from) while she goes to the spa for a massage (avoid including the masseuse unless a specific gender is requested).
After the shortest game of golf in known history, they decide to drive down a lovely lane into the sunset with the top down (the sunset is stuck on pause).
They arrive in a limo at the most exclusive restaurant dressed in formal evening wear (it's a magic car). They dance. He dips her during a tango while she holds a rose in her teeth.
They meet friends from across the globe and all laugh by the fireplace. Then, they sleep soundly (smiling with perfect makeup) as the sun rises past the lace curtains.
They teleport through a clean-and-perfect-hair machine to the restaurant and are instantly served the finest breakfast (more detail shots) by a different attractive server or the head chef.
What a life. It wouldn't have been possible if this couple went to a different inn. :-)
Consider the options
Let this idea stew a little. Most PJs can see some potential clients in their hometowns. They can also see a few piggyback deals from the story above.
Again, I'll emphasize the importance of PJs discussing freelance policies with their employers before accepting gigs. Commercial gigs are a way to augment income and afford the nifty equipment we've needed. These gigs can also reduce those educational expenses we've racked up.
I plan to post more information about commercial work. Although most PJs consider commercial work "the dark side" (as in "come to the dark side"), it allows for a creative release, potential income and actually may produce future ad revenue for the paper once local businesses have quality images.
As long as no conflicts of interest are created, consider commercial options.
I back-posted a commercial photo story. The rough narrative is it's a great place to meet friends or be alone. The upscale coffee shop has meeting rooms for businesses and Wi-Fi for individuals. They offer food and custom coffee drinks for busy executives. They also offer thoughtful gifts for anyone's needs. As explained above, the narrative is fiction, so feel free to create your own story line.
Enough for now,
Subscribe to:
Posts (Atom)


