Saturday, October 30, 2004
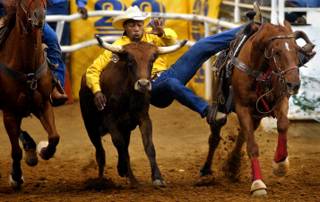
Take life by the horns
Mark M. Hancock / © The Dallas Morning News
Lloyd Goodman of Beaumont competes in steer wrestling during the Cowboys of Color Invitational Rodeo 2004 Southwest Tour finals at Mesquite Championship Resistol Arena in Mesquite on Saturday, October 23, 2004. He had the evening's fastest time at 4.39 seconds. Proceeds benefitted the National Cowboys of Color Museum and Hall of Fame.
Oddly, I can relate to this image much more now than last week when I made it. ;-)
Today was uplifting. I’ve seen how caring and compassionate the journalism corps truly is. If any of my fellow DMN ex-pats haven’t read posts for the last few days on D Magazine’s Front Burner or the leads from Eric Celeste at The Dallas Observer, please check them out. It soothes some of the sting and makes you stop considering a job at a Podunk biweekly (people are making room for us).
We’re good enough, we’re smart enough and, gosh darn it, people like us. Well, technically, they like copy editors, but maybe we can get jobs too. ;-)
Enough for now,
Thursday, October 28, 2004
Strange, I don’t feel thinner
Well, I’ve been "downsized." Joy. I see this as a challenge and opportunity rolled into one. Somehow, it's "best" for me. We'll see what presents itself.
The bad part about working for one of the best photo departments is everyone is great. When it's time to trim the tree, there’s no deadwood. So, they must cut those closest to the ground. I wish I could've been the only one let go. My heart goes out to the others. Hang in there kids.
At least it's an amicable break. I got a severance package and can freelance while I look for a staff job elsewhere. I don't believe anyone wanted to cut staff, but it happened. I appreciate the many calls I've gotten from remaining staffers. I have utmost respect for them. Each caller has offered to be a reference.
Consequently, if anyone knows of a cozy staff job or possibly a professorial position, please direct them toward my resume or let me know. I'm revamping my portfolio today. It should be online Friday morning. I’d prefer Texas, Florida, California or other southern states, but I’m open to whatever’s available. Cancun would be nice. :)
I'll freelance and do other local gigs in the short term. I've considered going independent and starting my own photo biz. However, I'd rather just work at making images for folks rather than fiddling with all the biz stuff. We'll see what happens by the end of November.
I'll continue to post while I seek a new home. It's not like I forgot all this stuff in my head. Actually, I'll probably post more frequently since I'll probably have more time on my hands for a while.
Enough for now,
Tuesday, October 26, 2004
How to shoot fast-track auto races - Part II
Mark M. Hancock / © The Dallas Morning News
David Starr (No. 75, left) holds off Jack Sprague (No. 16, right) during the NASCAR Craftsman Truck Silverado 350K race at the Texas Motor Speedway in Fort Worth on Saturday, October 16, 2004.
In Part I of this post, we went over the logistics of access and pre-race preparation issues. Today we’ll discuss getting the shots. PJs expect to shoot a lot of frames at every assignment. Auto racing requires an even higher take to get solid, publishable images.
Unlike many other sports, the sequence is unpredictable. PJs may get the best shots immediately after the start and not get safe shots until halfway through the race.
Before the race
If PJs have commitments for time and print space (designated open holes), work the area around the speedway. Some racers, fans and sponsors camp on the outskirts of the speedway area or in the infield. There are hundreds of potential features and photo stories available in the camping areas.
If a team of PJs are covering the event, consider juxtaposing team owners at near-by luxury hotels with camping fans. What are the differences and similarities?
Work the parking lot for tailgate party images. These tend to be colorful and flamboyant. Try to work the speedway into the background to give the images a sense of place.
Immediately surrounding the speedway’s front gates is something similar to a race carnival. Sponsors and vendors transform semi-trailers into everything from take-away restaurants to interactive, state-of-the-art race simulators. These displays are extremely colorful and get the fans fired-up for the main event as well as creating brand loyalty. Within a few hours of the final race’s finish, they are packed up and gone. There are several visual possibilities here as well – particularly if coordinated with the Business section reporters.
PJs with pit access work the teams and crews for “down time” images. The motor crews work hard, but they also play hard and enjoy extreme sports. Look for drivers doing something unrelated to racing (cuddling children, skateboarding, playing with toys, etc...).
The pole
The “scoreboard” in an auto race is the infield pole. The pole has typical lighted numbers like other scoreboards, but it is read from top to bottom. The top number is the lap number. The name of most races includes the total number of laps. However, check to get the correct number of laps (as opposed to miles or kilometers) before the race begins. Knowing the lap number is critical as the finish of the race approaches.
Next, vehicle numbers are displayed in order from 1st to 20th down the pole. At the bottom of the pole are the lap times of the two lead vehicles.
PJs can watch the pole for changes as well as estimating if the second vehicle is about to make a move on the lead vehicle (because the lap time might be slightly higher).
Get the safe shots
Again, the safe shots aren’t sequential. Safe shots are determined by the number of starting racers in any particular race. Visual opportunity, stress (of missing “the” shot) and danger increases as the number of racers increase. Meanwhile, the number of safe shots decreases because of the previous statement. I’ll describe the absolute safest route, but scale back as the field size increases.
There is no anticipating who’ll wreck or win from the start to the finish. The absolute safe shots begin before the race. Get shots of each car (preferably with its driver) before the race begins. This lets PJs know the paint colors and patterns of each car for IDs later. At a high 45-degree angle, PJs can capture the front, top and side markings of each vehicle. It’s enough to confirm the difference between each car. The cars are displayed before each race and this allows PJs to run down the line to document each car (as well as its pole position).
Introductions
Before each race, drivers are introduced and make a quick statement to the fans. Avoid "talking head at microphone" shots and work the line of drivers waiting for introductions. This gives PJs a chance to get quick mug shots or features of the racers interacting while they aren’t wearing helmets.
Watch the flags
Above the start/finish line is a flag stand. The person in this stand determines the status of the race by waiving different colored flags. It’s safe to get an image of this person waiving each color flag. We don’t know what controversies are brewing in the pits or owners’ boxes, but the flags will often be able to represent a problem.
Flag meanings:
Green flag = start (both initial start and restart)
Yellow flag = caution (wreck or debris on track)
Red flag = full stop (wreck on track / emergency situation)
White flag = one lap left
Checkered flag = finish line
Furled flag = final lap before an action (often a furled green flag before a restart)
Caution flags
After a wreck, the vehicles bunch together and move relatively slowly behind the pace car while the wreck is cleared. This is a chance to get tight shots of one to three cars per frame. If something horrible happens to one of the remaining cars, the PJ can use these images to represent the story (because the wreck was on the opposite side of the track behind a wall or some time later in a different city).
Recovered vehicles
Vehicle recovery isn’t like on the highways. The wrecker attaches a hook to the top of the disabled vehicle, lifts and off it goes to the infield. It happens within a few minutes. Because there might be some additional story about why the vehicle wrecked or had a mechanical problem, take one or two loose shots of the recovery vehicle with the car attached.
Winner’s celebration
After the finish of each NASCAR race, the winner burns some donuts near the finish line. Both the roof and infield shooters should expect and document this.
Next, there will be a standard trophy/check presentation with obligatory champagne, juice, soda or milk splashing. This is typically handled by the infield PJs because there’s not enough time for roof shooters to get the finish and make it to the infield before this is a done deal.
These images add a genuinely happy human face to a story about machines. Frequently, these images get better play than actual race images. So, although they're listed as "safe shots," they’re also required.
Luckily for PJs, the racers have seen/participated in enough of these celebrations to know how to make a good show for PJs. They play the scene like most experienced rock stars and give PJs different visual and layout options. Think of it as an elaborate touchdown dance.
What’s important?
Since the difference between vehicles is slight, the winner of a race is all about the driver and pit stops.
Drivers
Drivers are judged by their aggression to the front. The most successful drivers take calculated risks and expect less-aggressive drivers to back away. It’s a millimeter game of chicken. If neither backs down, a wreck can happen and neither wins.
A driver’s aggression is visually represented by passing. A good driver takes the prime course through a track and tries to pass on the straitaways. An aggressive driver tries to pass in the turns as well (either high or low on the track). The most aggressive drivers will try to force a three-car pass (normally low on the track) and hope the other two realize the danger and back down.
Believe it or not, this may be the most exciting event of the whole race, so the PJ better get it. When all three drivers are superior, the PJ may get two or three turns to follow this battle. If any one of the three has a temporary lapse of reason, everyone goes into a wall, and the PJ is already on it.
Mark M. Hancock / © The Dallas Morning News
Crew members work on Dennis Setzer's truck during the NASCAR Craftsman Truck Silverado 350K race at the Texas Motor Speedway in Fort Worth on Saturday, October 16, 2004.
Pit stops
The machines are basically traveling from Dallas to Little Rock (New York to Virginia / Italy to Poland) in about an hour and a half. This requires lots of fuel, new tires and other repairs. Since each fraction of a second is important, all fueling, tire changes and repairs must be done simultaneously in a matter of seconds. This is done by a highly-coordinated pit team.
The team members are well-paid professionals in a potentially deadly area. A fraction of a second is also the difference between a fire and/or a broken leg in the pit. Shoot the activities of these technicians because it’s equally important to getting the win.
Mark M. Hancock / © The Dallas Morning News
Alex Barron's mangled Indy car skids across the infield during the IRL Chevy 500 race at the Texas Motor Speedway in Fort Worth on Sunday, October 17, 2004.
Look for wrecks
As with everything else, I don’t wish a wreck on anyone. I hope all the racers finish. However, most of the time, they won’t. Machines break. Editors and readers expect to see wrecks if they happen. PJs are expected to get these (preferably mid-air with a clean background).
Wrecks can happen anywhere on the track at any time. However, there are some predictable situations to watch. An additional problem is speed. If a car even wiggles, hit the auto-winder because the car will disintegrate faster than the brain can tell the finger to shoot.
Major wrecks occur when vehicles are close together. The likelihood of a wreck is increased in the turns. Each track has one or two turns which are wreck magnets. When all are combined, it’s obvious where to watch.
Bunched vehicles
If a vehicle loses a tire, it will spin and wreck. If it’s surrounded by other cars at the time, they all share the joy. Consequently, major wrecks are most likely at the beginning of the race or at restarts after a yellow-flag caution.
For PJs, it’s like jumping on a bus going 60 mph. The cars move slowly for several laps during the yellow, the green is waived, the cars accelerate and another wreck happens. If PJs aren’t ready, it’s over.
To be ready for an initial wreck, follow the largest groups of vehicles during the majority of the race. This is the most likely place for problems. The leader is the least likely to wreck because s/he normally has more time to react (unless passing the tail at the time). The group directly behind the leader is the most aggressive, so it’s the best place to look.
Similarly, when one vehicle tries to pass another vehicle, they may get very close together and occasionally bump. Get the bump, but if the bump is too hard and either vehicle loses traction, both may go for a tumble.
Turns
Although fast-tracks are banked, vehicles are most likely to lose traction in the turns. If the track gets wet, expect dangerous turns.
Trick turns
No matter how well a track is engineered, each turn or curve has its own character. Typically one turn creates more problems for drivers than others. Knowing which turn is most likely to cause problems is good for PJs.
Research the track’s history and/or ask other PJs or fans which turns create the most problems. Find a position to cover this particular turn and watch it particularly when more than one vehicle tries to take it at the same time.
Mark M. Hancock / © The Dallas Morning News
Chad Blount (No. 2, left) spins out and pushes Denny Hamlin (No. 03, right) into the wall during the NASCAR Craftsman Truck Silverado 350K race at the Texas Motor Speedway in Fort Worth on Saturday, October 16, 2004.
Secondary wrecks
Although PJs may miss the primary wreck, get on it quick because a wreck normally causes secondary wrecks. A damaged car slows down and/or may veer in any direction. Meanwhile, other cars are speeding into the wreck area. This causes additional braking and swerving. Secondary wreck can be caused by both the reaction to the initial wreck or from the original wreck skidding and entering the track again at a different location.
Try something creative
For most of the race, nothing visually significant happens. For PJs running two camera rigs, this allows time for some experimentation. Try some slower exposure pans with the vehicles to blur colorful backgrounds or foregrounds. It’s also interesting to juxtapose still items (people in lawn chairs on motor homes) against the blurring cars on the track.
Some other novel ideas can be silhouettes, nighttime flash synchs, layering speeding vehicles inside interesting foreground elements, reflections, negative space experiments or any number of other gadgets in the PJ toolbox.
Mark M. Hancock / © The Dallas Morning News
Helio Castroneves of Sao Paulo, Brazil takes the checkered flag to win the IRL Chevy 500 race at the Texas Motor Speedway in Fort Worth on Sunday, October 17, 2004.
Get the finish
I can’t overstate the importance of this singular frame (at these speeds, there’s only one frame). The whole day’s shoot (as well as time trials) leads to this one frame. Better have it or quickly catch the next plane to “anywhere.”
Plan for the finish
There are no visual surprises with the finish of a fast-track race. A vehicle (maybe two) crosses a specific line on the track at a specific speed after a specific number of laps. The PJ must be in place, have fresh batteries and disks/film and know what and how to shoot before the white flag lap.
Before the race, find the best position for a clear shot at the finish line. This isn’t normally the best place to shoot the race, so look at it from several angles. PJs want an unobstructed view and a clean background with a clear view of the finish line and, preferably, the checkered flag.
If PJs cover time trials or more than one race, they should practice timing the finish for each type of vehicle. Since every camera has a different shutter lag time, it’s best to know exactly when to shoot to align the vehicles with the finish line. A few test frames on dit cameras is strongly advised.
When the race has 20 laps left, change batteries. When only five laps remain, get in position and change to new disks and/or film. This should eliminate the sinking feeling some experience when the camera won’t fire at the exact moment it MUST. It also makes editing easier on deadline.
Execute the finish
As the race draws to a close, the PJ is in the right place with fresh batteries and disks/film. The PJ also knows the shutter lag time and has a visual shooting mark to compensate for the microsecond delay.
However, this still doesn’t guaranty a decent image. To get a good shot, we go back to the photography basics: exposure, timing and focus. We have already have timing figured out.
Next, during the last lap or two, use one or more alternate means to verify correct exposure. Because the track may be black or near white with a broad white painted line, PJs may need to manually control the exposure for the finish. Additionally, the winning car might be white or black and again give a wrong meter reading. Set the correct exposure for the light falling on the finish line.
The last of the three elements is focus. Autofocus doesn’t mean it can focus on a speeding auto at the right time. Switch to manual focus and prefocus on the finish line with enough depth-of-field to handle the difference between the ground and the top of the driver’s head or vehicle.
Lastly, get it. Look at the pole to spot the correct leader. As the leader comes into view, pan the camera with the car until it hits the shutter lag marker and shoot and wind through a few frames (there could still be a wreck after the finish). Notice how the first shot is actually the only shot expected.
If a PJ expects to get the finish with frames per second, the finish will be missed. The vehicle will speed over the finish line at around 3/8000ths of a second. Even at 6 FPS, this gives a PJ 7,994 chances to fail. I’d rather take the 1-in-3 chance.
By panning on the leader, the PJ ensures the vehicle is the sharpest object in the frame. Otherwise, the car still blurs.
If PJs don’t want to risk as much on 3/8000ths of a second, they can increase their odds by dropping down EV toward a slower shutter speed. This creates more area blur -- not particularly bad if one’s trying to show speed -- and is more forgiving of timing (249 chances of failure at 1/250th vs. 1,999 at 1/2000th).
Enough for now,
Saturday, October 23, 2004
Cool rides
Mark M. Hancock / © The Dallas Morning News
Wesley Nelson of Kaufman drives his 1958 Chevrolet Impala past a display of WWII training planes at Mesquite Metro Airport in Mesquite during a motorcycle, car and airplane show on Saturday, October 23, 2004.
Sometimes the subject matter is just cool. Yup, there's several technical problems I couldn't control. However, isn't this a cool ride?
Friday, October 22, 2004
Rodeo silhouette
Mark M. Hancock / © The Dallas Morning News
Byron Hodges of Dallas (left) talks to J.W. Hutson of Fort Worth (right) during preliminary competition for the Cowboys of Color Rodeo at the Mesquite Championship Resistol Arena in Mesquite on Friday, October 22, 2004.
FSC kicks off
I know this is late, but there's still enough time. The NPPA (National Press Photographers Association) annual Flying Short Course starts tomorrow. It's in a different city every other day for a week. One of the stops is within driving distance or a cheap air fare for just about everyone in the U.S.
If you've never been to one, go. This year would be a particularly good year because I work with two of the lecturers (David Leeson and Cheryl Diaz Meyer). Nonetheless, it's a great way to do a little networking and get motivated about the profession. BTW, college professors and high school teachers will normally give students the day off to attend without punishment. They may require a report, but it's worth it.
If you go, try to arrive the night before the FSC. Take your portfolio and two pieces of Canon or Nikon equipment (for example, a body and a lens) for a clean and service.
Senior PJs set up in the lobby with light tables, laptops and cocktails to give critiques the evening before the FSC. They're not going to coddle anyone, so brace yourself. Each critiquee (if there is such a word) gets about 15 minutes of torture and horror with each of several experienced PJs. Theres always a line of masochists, so be patient. You'll walk away knowing your useless and never should have gotten into this profession soon enough. ;-}
The two camera companies provide techs to clean and service operable equipment (they don't perform miracles, but will make minor repairs if they can). This alone can equal the entry fees. Arrive early to turn in equipment because they only accept equipment during a very short time window and have a limit to the amount they'll accept.
After the PJs turn in equipment, they can hear lectures from old-timers, new-comers and get a laugh or two at other PJs' experiences. PJs can also tinker with and get information about the newest professional toys. Sponsors and vendors also have a few lottery giveaways throughout the day (I've won a photo vest one year and a nice shirt a different year). I've been to several FSCs across the state and was never disappointed.
Enough for now,
Thursday, October 21, 2004
Touchdown bound
North Mesquite High School's Travon Wilson (No. 7, right) runs for a touchdown against Rockwall High School during a football game at E.H. Hanby Stadium in Mesquite on Thursday, October 21, 2004.
Mark M. Hancock / © The Dallas Morning News
Wednesday, October 20, 2004
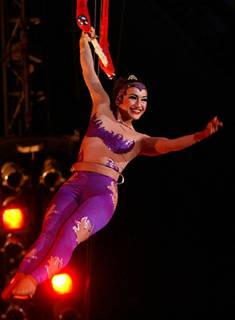
Circus Chimera trapeze
Mariana Chimal performs "Single Trapeze" during the Circus Chimera in The Colony on Wednesday, October 20, 2004.
Mark M. Hancock / © The Dallas Morning News
Chimera contortion
Gana, from Mongolia, performs "Contortion" during the Circus Chimera in The Colony on Wednesday, October 20, 2004.
Mark M. Hancock / © The Dallas Morning News
Poor beast
On a sad note, my "beast" strobe (Norman P200D) got sick (shorted out) last week. It's must go to the strobe hospital. I had to shoot volleyball in a dark gym without it last night, and I'm not happy with the results. Hopefully it'll be fine soon. :-|
Tuesday, October 19, 2004
Green Day two
Mark M. Hancock / © The Dallas Morning News
Billie Joe Armstrong (left) and drummer Tre Cool (right) of Green Day perform during a concert at the Fort Worth Convention Center in Fort Worth on Tuesday, October 19, 2004.
Green Day spotlight
Billie Joe Armstrong of Green Day performs in the spotlight during a concert at the Fort Worth Convention Center in Fort Worth on Tuesday, October 19, 2004.
Mark M. Hancock / © The Dallas Morning News
How to shoot fast-track auto races - Part I
Mark M. Hancock / © The Dallas Morning News
Vitor Meira (No. 17, left), Tony Kanaan (No. 11, center) and Helio Castroneves (No. 3, right) battle for the lead during the IRL Chevy 500 race at the Texas Motor Speedway in Fort Worth on Sunday, October 17, 2004. Castroneves won the race. Kanaan had sewn up the series win before the race began. He is the only racer to complete every lap of every race of the entire season of any major motor sport series.
I shot my first major auto racing events this weekend. I had a steep learning curve (Ouch!). Consequently, most of the issues in this post are from the "I wish I had..." category.
I thought horse racing was difficult and stressful. The horses move fast and only cross the finish line once. At least with the cars, I figured I'd have several attempts at them – you know - since they go round and round. Silly rabbit. No horse runs this fast. BTW, cars only cross the finish line once as well -- at 212 mph.
After the first day’s Silverado 350K (NASCAR trucks), I realized how hard it is to shoot races. So, I went back to the office and studied each and every photo in our archive and tried to figure out what the other PJs did and what makes good shots. I did much better on the second day with the Indy cars during the IRL Chevy 500K (they’re even faster).
Since this is an expanding sport (it’s already big, but it’ll get even bigger), I’ll share what I’ve learned from a weekend’s worth of panic, frustration and mistakes.
Get proper credentials
Luckily the desk handles most of the pre-race credentials legwork. Additionally the paper is a major sponsor, so we get some preferential treatment. For those who want to run the gauntlet solo, start early to get everything in proper order well before race day.
Even if PJs work for mid-sized newspapers, they may want to talk with their editors about acceptable double-dipping with a regional magazine to bump up their credential bid request.
Most speedways will probably require written requests for credentials. Go to the nearest track’s Web site and find credential information or the media relations coordinator for inquiries.
Like most other big events, the number of credentialed PJs will be limited. It’s not only an access issue, it’s a safety issue as well (at least two PJs were gruesomely killed while covering races in recent years). Additionally, people who’ve invested huge money into speedways and racing teams want the widest possible publication for their efforts. They need to draw fans and additional resources to keep the biz going.
Even with all the previous requests and authorizations, the PJ is required to present a photo ID and personally receive the access badge and parking permit as well as sign a waiver of liability. Get it as early as possible to avoid lines and chaos.
If the PJ has highly-limited access (roof, pit), make sure to get the additional credentials or stickers. If additional safety vests are required, pay the deposit early and get it before the last-minute rush.
Practice wherever possible
I’d strongly suggest shooting time trials (and anything else) to get a grip on handling the long lenses, speed and course design. Obviously the time trials are the best option. Try several locations and angles. Find the best locations to cover the most corners (where accidents are most likely to happen).
Practice panning skills to get proper rhythm for good images. Track vehicles through turns to access how much depth-of-field will be required (during a pan from start to finish without blind [mirror up] focusing).
Although I’m accustomed to big lenses, this kicked it up a notch for me. I maxed-out everything the second day (600mm with a 2X converter on a dit – effectively a 1,800mm lens).
If logistics don’t allow PJs to go for time trials, at least practice on a nearby highway. Make this practice as hard as possible on yourself. It’ll be worse on the track, so get good before the pressure hits.
Find the fastest road nearby. Set up a tripod and the longest lens available. Work to get sharp images of smallest cars on the road (preferably in a fast curve). Next, try to frame up only the drivers’ faces. I already hear the squeaks out there. The point is to be prepared for a relatively small object traveling at aircraft speeds (about 1/3 the speed of sound).
To do this, the PJ must get long glass, then double it, then move it as close as (safely) possible to the moving objects. Each level of expertise requires a smaller target to keep within the viewfinder frame.
Bring the right equipment
The standard PJ gear is needed for racing. Obviously, long lenses and a tripod are preferred. However, the PJ will need to bring some extra items as well.
Hearing protection
High quality earplugs or gun range/industrial hearing muffs will do. Try to get protection for at least 21 decibels of sound. In either case, protect your hearing.
If opting for earplugs, choose the right size. Try to find U.S. Army issue earplugs, which come in different sizes. These can also be easily cleaned with soap and water. Use foam rubber earplugs only as a last option since they aren’t as effective nor as sanitary after the first use.
The muffs allow PJs to listen to a radio play-by-play of the race by also wearing earbuds inside the muffs. When choosing muffs, research before buying. These aren’t horribly expensive (compared to photographic equipment), but it's important for them to work well without creating additional distractions for the PJ.
Choose muffs with well-padded ear covers and headband. Additionally, make sure it's solidly constructed rather than snap-together plastic. The headband should be made of flexible metal.
For PJs planning to pursue this sport, high-quality ear covers with built-in speakers can wire directly to Bearcat-style radio scanners. The allow PJs to hear drivers talk with their pit crews during the race.
Food and water
Eat well before getting into position. PJs will need energy to make it trough each race. Additionally, take extra bottles of water in belt holsters. Most races are held in during the afternoon with no overhead shade. It gets hot, and PJs need enough water to make it through the race without needing to run to the restroom.
Radio with earbuds
Most tracks have radio agreements for race days. Find out the proper frequency and preset tuner buttons. Get a small armband radio or a small one that can clip to a camera bag or tuck securely into a shirt pocket.
Attach earbuds (miniature earphones which insert into the ear) to the radio, and cover them with protective ear muffs.
The radio will be about 10 seconds behind actual action, so it isn't much use to let the PJ know what's happening on the track. However, between peak action moments, the announcers will talk about side issues of importance. Make sure to address visually as many side issues as possible (track conditions, records, milestones, etc.).
Security rope
Security ropes are critical for anyone shooting from the roof. Securely tie each lens onto each tripod or monopod. Then use a separate rope to tie the support to posts atop the building. No PJ wants to even consider what would happen if a gust of wind tossed a 600mm on a tripod off the roof and onto the spectators below.
Even if the camera is securely attached to the PJ with a camera strap, I’d still suggest a secondary rope attaching it to the PJ’s waistbag or photovest.
Additional precautions such as taping lenses onto cameras with gaffer's tape might be a good idea. If it could be a problem, it’s best to fix is first.
It isn’t as large a problem for the infield, but the vacuum of cars passing can easily pick up light items and create major problems. Make sure coolers, chairs and such are secure and won’t blow away under any circumstances.
Other safety gear
This is a sport where I don’t think anyone could be too safe. If the PJ has access and funds for fireproof suits or a helmet (for infield shooters), go ahead and get it. Everyone else is wearing helmets and fireproof suits, so you won’t be the only nerd in the infield.
As a side note, photographers aren’t allowed to wear shorts at major race tracks. They will be told to put on long pants or leave because exposed skin can lead to fire-burned skin and nobody wants it.
Camping equipment
Some PJs bring collapsible lawn chairs, small ice chests and other creature comforts. Make sure they are out of major pathways and all items are tied down.
Get there early
I got to the Texas Motor Speedway hours before start times. Judging from the traffic snarl near the speedway, I can only imagine how miserable it must be for a big NASCAR event. Probably it’s best to camp overnight for the big events.
From what I understand, more than 100,000 people attend the Texas NASCAR races. About 94,000 attended yesterday’s Chevy 500, the IndyCar series finale and championship. This is almost 15,000 more than attended the 2004 Texas/OU shootout football game (79,587).
Learn the game
Start with NASCAR 101 and the Indy Car overview. Knowledge about the driver/team stats and personalities as well as the track itself is vital to shooting the right cars in the right places at right time.
Without being a "gearhead," the visual concepts are simple. Key elements of the game are speed, passes, wrecks, pit stops, and the finish. These determine who wins the race. Every major race has the same elements plus a victory celebration.
Get the start sheets
Get a list of participants and pole positions (where they start). The sheets should be available in the media center. If PJs did as suggested above, they already know who the racers, owners and sponsors (cumulatively the players) are. They’ll also know which (if any) of the players are local or about to break some significant record or milestone.
Otherwise, scan the information sheets for any clues. If nobody appears to be local, ask around. Local players are needed for future stories. Get help from the media relations professionals (they are walking encyclopedias of information). Likewise, the team members and even fans can point PJs toward interesting sidebar stories.
At least find the closest racer to the PJ's readership. This is most important in IRL (Indy Racing League) because the teams tend to be international.
Then PJs are ready to get in place and get the job done.
Enough for now,
Please see Part II.
 
Friday, October 15, 2004
Bradfield bulldog
Larry Hagenbuch (bottom) carries and talks to his son Henry Hagenbuch, 2, (top) during the Bradfield Elementary School carnival at the school in Highland Park on Friday, October 15, 2004.
Mark M. Hancock / © The Dallas Morning News
Wednesday, October 13, 2004
Both Worlds Tour
R&B singer R. Kelly (left) and rapper Jay-Z (right) perform as part of the "Best of Both Worlds Tour" at the American Airlines Center in Dallas on Wednesday, October 13, 2004.
Mark M. Hancock / © The Dallas Morning News
This image is a perfect example for the Use the dynamic range post. The dynamic range must be used to get anything useful.
The performers were wearing solid white outfits. The background was often black. The meter was going crazy. So, I set the exposure variance to +2 stops and set the meter to spot. When I placed the meter on their outfits, it overexposed the spot metered area by two stops and made everything else the correct exposure within the five stop range.
I could have chosen to spot meter their faces, but I was shooting from one end of the arena to the other, and they were moving around a lot. This was the most economical way to get a correct exposure for the scene.
Enough for now,
11/1/2004 UPDATE:
This was supposed to be a simple entry about how to meter white costumes and the singers had to do this.
Mark M. Hancock / © The Dallas Morning News
This image is a perfect example for the Use the dynamic range post. The dynamic range must be used to get anything useful.
The performers were wearing solid white outfits. The background was often black. The meter was going crazy. So, I set the exposure variance to +2 stops and set the meter to spot. When I placed the meter on their outfits, it overexposed the spot metered area by two stops and made everything else the correct exposure within the five stop range.
I could have chosen to spot meter their faces, but I was shooting from one end of the arena to the other, and they were moving around a lot. This was the most economical way to get a correct exposure for the scene.
Enough for now,
11/1/2004 UPDATE:
This was supposed to be a simple entry about how to meter white costumes and the singers had to do this.
Tuesday, October 12, 2004
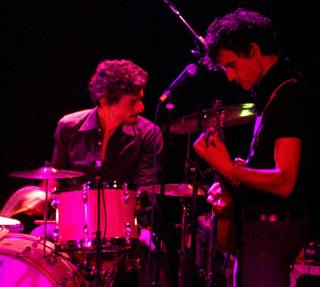
Blonde Redhead
Mark M. Hancock / © The Dallas Morning News
Twin brothers Simone (left) and Amedeo Pace (right) of the band Blonde Redhead perform at Trees in the Deep Ellum area of Dallas on Tuesday, October 12, 2004.
If anybody plans to grow up and be a lighting designer for a band, please don’t do this to us poor PJs. Yes, magenta is a pretty color – in moderation. A solid magenta design with red and blue highlights only makes PJs lose their minds. Blue + red = magenta. Magenta + magenta = arghhh.
These particular lights can be set to various colors – including "white" (at least close enough to color correct). If only for the first song or two, give us a fighting chance at a decent exposure.
This exposure is 1/6th of a second at f/2.8 and 1600 iso. When we consider it was shot through a 300mm lens, I'm surprised I got anything. At least I wasn't limited to the first three songs.
For those who have never tinkered with colored lights or gels, red and magenta are OK for side and back lighting. However, if these colors are primary source lights, the image will look like poop if it runs B&W (it flattens all the skin tones).
Since I mentioned it, also avoid green unless working on an illustration about nausea or something Halloween related.
Enough for now,
Use the dynamic range
Photographers talk about Adams’ Zone System when they often mean the dynamic range. His system contains 11 zones of image tonality (0-10), while the dynamic range contains five. The Zone System is cool for art photographers, but is less useful for PJs and the general public. Most PJs use a dynamic range for daily work.
I’m not bashing the Zone System. It’s a wonderful system for those who have the time, knowledge and inclination to use it. However, it’s not practical for PJs who have one hour to drive through snarled traffic to a scene, get the shot and transmit to make deadline.
The Zone System
For those unacquainted, the Zone System operates along the standard dynamic range (see below) with the addition of photographer controlled film exposure, development and additional tinkering while printing on a calibrated system. Frequently, a photographer is required to push or pull film to constrict or expand the tonal range of a single frame. Additionally, a deliberate base fog on the film may be required to open up shadow detail while reducing development time to restrict highlight density.
I don’t suggest PJs try to lay down a base fog on a digital exposure or dunk their dit into a bucket of Dektol or T-Max to control development. It will control the development, but not the way anyone wants.
Dynamic range
A good guide for most photographers is the dynamic range. It consists of five stops of light. The dynamic range shifts light from white to black and vice verse anywhere along this range. Furthermore, the photographer sets a point along the range for each tone by deciding which tones to let fall away.
On the dynamic range, these are the five tones:
1. white with detail
2. light gray
3. middle gray
4. dark gray
5. black with detail
A simple explanation is at the end of most people’s arms. Look at your hand. Imagine your middle finger is middle gray. In stops of light, this example makes your pinkie white and your thumb black, both with detail information. Consequently, if you want to turn your pinkie black instead of white, you must stop down four stops. Conversely, if you want your thumb to appear white, you must open up four stops.
I know, it's a strange example, but wait until the next time you want to photograph a swan and you catch yourself looking at your fingers to find the right exposure. ;-}
This exposure control can be accomplished with the aperture, shutter speed or film ISO. The camera doesn’t care which adjustments are made, but it will require manual control.
We understand how a camera’s reflective meter works. A camera meter tries to make a general scene middle gray. If the camera is pointed at a tire, it will make the black tire gray (overexposed). If the camera is pointed at a cloud, it will make the white cloud gray (underexposed). If the camera is pointed at a small fire at night it will make the fire solid white and most of the rest solid black. Joy.
Some of the high-end professional cameras use complicated algorithms and RGB multi-sector metering to avoid this basic problem, but it’ll do the same darn thing more often than not.
Therefore, it’s important to know how to out-think the meter. With digital cameras, you can "chimp" (look at the display screen) and adjust. However, it’s better to hand meter the scene because the viewing screen can be off by two stops. We’ve discussed several ways to ensure the correct exposure.
Choose what to keep
We’ve metered the light and set the correct exposure. We've even double-checked the exposure with one of the alternative methods. However, the image isn’t getting the color saturation or pop we want. Sometimes, we simply don’t like the tonal shades in which we’re working. What can we do? Shift the tonal range.
In flat, even light, there isn’t a problem. A proper exposure yields blacks and whites with texture. However, when the light is raking the subjects from one angle or the light sources are dim or unevenly distributed, the PJ must make some choices. Something isn’t going to fit within the standard five-stop variance.
The tonal range can be shifted with any of the three methods listed above. Some make more sense than others depending on the subject matter. The point is to find which parts of the tonal range to keep and which to let fall away. The ends of the dynamic range (detailed blacks and whites) are the sacrifices. The whites can either blow out or the blacks can become voids. However, the right decision will save the overall image. The PJ must choose what to save and what to let go.
An extreme example
Most of the time, PJs are dealing with people as subjects. We encounter every possible skin tone and must make quick decisions under often stressful circumstances and incredibly bad lighting.
Consider for a moment the exposure for a person handcuffed on the street at night with police lights flashing behind the subject while a spotlight is on the subject’s face. What’s the correct exposure?
First, switch to spot meter on the camera’s reflective meter. Next, color balance for the tungsten light of the spotlight. Now it gets interesting.
If someone has particularly less-reflective skin, I’ll lean toward overexposing actual tones by one stop (-2 + 1 = -1 from middle gray). I’ll do the opposite if they have overly reflective skin and hair (+2 – 1 = +1 from middle gray). I still get the same five stops of dynamic range, but I have set which five I want to capture.
With less-reflective skin, I’ve moved the black zone to dark gray. I understand this takes all the detail out of everything four stops lighter, but it’s my choice. With highly reflective people, I’ve added some texture to their skin and hair, but black T-shirts lose texture and becomes a dark voids. Again, this is my aesthetic choice rather than a meter reading.
In most cases, the red and blue police lights will accumulate on the CCD or film and become glowing white. Meanwhile the surrounding area, which is not in a spotlight, will drop down to black. So, I’m stuck with a relatively proper exposure of a suspect’s face while everything else in the scene pushes off both ends of the dynamic range.
Since I know I’ll be facing an editor, I’ll also make an overall scene exposure. This increases the saturation of the police lights, but drops the subject’s face back into darkness with the rest of the scene. However, this might be useful to set the mood of the scene or conceal the subject (if a minor). Yet again, this is not setting the scene to middle gray, but setting the lights to middle gray to saturate the color.
Handling less extreme dynamic range choices
Sometimes, a subtle decision must be made about the dynamic range. Light raking over a subject will make the PJ decide between highlight and shadow detail. Only one can be kept if the light has more than five stops of exposure latitude.
Each subject will typically dictate the best decision. If there is something interesting within the shadows, shift the range to keep the shadows and let the overall image become high-key. If something interesting is in the highlights, keep the highlights and let the shadows drop.
Dramatic dynamic range shifts
Occasionally it’s interesting to give a scene a little push. In these cases, PJs may deliberately set a tone to something other than the standard. Digital cameras allow immediate feedback at least. If it doesn’t work, there’s no harm done.
Some common examples of dramatic use of the dynamic range include silhouettes and high key portraits. When combined with a strobe or flash, it gets even more interesting.
Silhouettes
A silhouette is nothing more than setting the shadow below the 1st step of the dynamic range. When middle gray or dark gray are set on the light source (the sun for example), the color saturation will increase while dropping other subjects and environments into two-dimensional blackness.
To make silhouettes pop, a primary subject with a strong shape is in sharp focus and normally a shallow depth of field. This defines the outline while minimizing competing elements within the frame. A giraffe in a barn would make a good silhouette.
High key
High key images are commonly used with fashion and bridal portraits. Like the silhouette, it's frequently shot toward the light source (an open window for example), but middle gray is set for the subject’s shadow detail and the background is allowed to blow out to white.
High key images are frequently "soft" because the subject’s edge detail is blocked up. Typically more depth of field is used to make these images and creates slight movement in the subject to further soften the overall appearance. A bride in a white gown would make a good high-key subject.
Combo dynamic range
Once the general principle of the dynamic range is understood, it can be combined with stobes, flash or even reflectors to make stunning results. The PJ can prepare a portrait for a silhouette scene and selectively light the subject within the silhouette framework. Likewise the PJ can prepare a high-key portrait and still maximize foreground detail.
Silhouette combo
The image in my mind is by Tom Fox. He made a portrait of a jockey on horseback inside a barn. The horse and jockey are silhouetted against a well-saturated blue sky and framed in the doorway of the barn. Instead of leaving it as a featureless silhouette, Tom snooted a strobe and lit only the face of the jockey to match the (probably -2) exposure of the sky.
In other words, he completely ignored the actual dynamic range of the scene, moved the range to have a well saturated sky, and then placed the jockey’s dynamic range within this exposure framework. The end result was an excellent image which used the power of a silhouette with the detail of the jockey’s face. It immediately told the readers who this person was in a dramatic way.
High key combo
This light combination can also used with the high-key scene. To get a soft white background and still retain maximum detail in a white wedding dress, PJs will use a strobe to balance the front light.
Measure the foreground light at middle gray (properly exposed). If the subject is a bride or some other subject wearing white, the PJ might want to set the white to light gray for extra detail.
Once the primary light is established, boost up the background's available light to blow out one or two stops above white. In other words, remove the background texture so it doesn’t compete with the subject. This is typically done by increasing exposure time because it’s the only loose variable once the strobe exposure is set. The result is a bride with full detail in her dress with a pleasant white glow engulfing her.
Enough for now,
 
Saturday, October 09, 2004
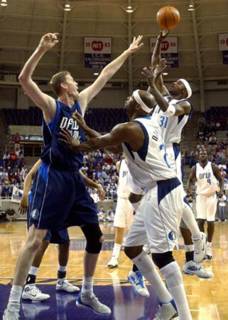
Mavs new faces
Jason Terry (No. 31, top right) tries to shoot past Shawn Bradley (No. 44, left) as Erick Dampier (No. 25, lower right) works to block during the annual Dallas Mavericks Blue-White basketball scrimmage at TCU in Fort Worth on Saturday, October 9, 2004.
Mark M. Hancock / © The Dallas Morning News
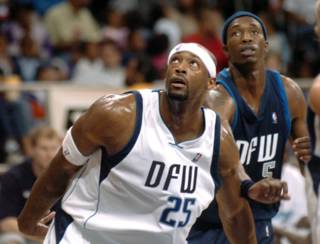
Dampier blocks
Mark M. Hancock / © The Dallas Morning News
Erick Dampier (No. 25, left) blocks Josh Howard (No. 5, right) after a free throw attempt during the annual Dallas Mavericks Blue-White basketball scrimmage at TCU in Fort Worth on Saturday, October 9, 2004.
Wildflower Nights
© Mark M. Hancock
This is an illustration to accompany a special section for the 1997 annual Wildflower! Music and Arts Festival. It was the first year to feature Wildflower! Nights, which is an evening-only concert series held the weekend before the main festival.
This image was made by light painting the foreground subjects with a flashlight and red, blue and green gels to make a cumulative white light. I probably threw some fill flash in as well to make sure the base exposure was right.
I made the image about 4 a.m. to make sure there was no strange traffic light patterns in the background. However, I think it would be cool to find a traffic medium where red tail lights make a curve around the instruments and give them the same effect.
The blue swirls in the background are actually me walking around with a blue gel on the flashlight pointed back at the camera. I wanted it to give the impression of music coming out of the instruments.
Although it didn't look quite as I wished (I should have drawn some music notes), it was OK. It was selected by the Dallas Press Club as a Katie Award finalist for Illustration.
 
Labels:
annual,
award winner,
festival,
illustration
Friday, October 08, 2004
Make the archive useful
I've been asked to describe the common workflow at a large newspaper. I will in time, but it won't apply to most PJs. Consider the Olympics as an example. In two weeks, two photographers and a photo editor shot and transmitted about 120,000 images. This isn't going to happen at a standard newspaper. It certainly won't happen to any single PJ.
The sheer volume of images moving through any system dictates the workflow. Huge companies move a large volume of images and have a different workflow than an individual freelance PJ. However one issue is common to both: specific images must be located quickly.
Organizing digitally
Organizing an image archive doesn't complete the puzzle. PJs must know where to find specific images quickly for clients. Otherwise PJs will lose sales or waste hours flipping through pages of negatives (or sorting through digital images).
Consumer database software is relatively inexpensive, easy to use and can be customized to handle individual PJ needs. The tutorials on most of these packages are good enough to get PJs started within a day.
Creating databases is a daunting task for seasoned PJs. There may be thousands of rolls to file. It may take weeks or even months to simply add standard information to a database. For new PJs, it's good to start a process and build upon it. A 15-minute daily time investment toward a useful database will more than pay for itself within five years.
PJs need to set up initial databases and save them to computer hard drives. Because databases change as images are added, it's impractical to keep them on CDs other than as a backup. However, backup CDs are strongly encouraged.
The advantages of consumer databases over pro databases are the start-up costs and learning time. A new PJ with limited funds can afford a personal computer (PC) with a simple database and word processor. It's enough to get a business started. With time, the PJ can build up to a powerful Mac system with serious random access memory (RAM) and storage.
But before we dream too big, let's crunch some information.
What's a database
A database is an electronic storehouse of information. Its design is flexible enough to handle many business needs. Individual databases can be designed to store and find client information, images, sales or pricing information.
Newer databases have incorporated mathematical functions and can operate as a spreadsheet. As computers have become more powerful, they can now store images and other large files electronically within databases. Again, each higher level of software includes a higher price, longer educational period and more computing muscle.
A standard database is arranged in rows (horizontally) and columns (vertically). The columns are fixed and labeled across the top of the screen. PJs can label and arrange the columns with categories to be as simple or comprehensive as they wish.
Each new entry becomes a row. Each row (entry) will contain the same number of columns (categories) as all other rows. The entry can be seen by itself in "form view" or as a grid with all entries in "list view."
Individual packets of information contained within the intersections of columns and rows are called cells. The cells contain the actual information within the database. Frequently, this information can't be completely seen in list view. However, the search will still bring these files and the PJ can select the individual entry to see more information. In all searches, the PJ typically looks for a specific image or selection of a few images.
As an analogy, consider an office file cabinet (database). Within the cabinet are file folders (files / rows). In each folder are separate pieces of information (cells). In this example, the goal is for the PJ to walk up to the cabinet and get a specific sheet of information without wasting time or looking through 250,000 folders.
Customizing the database
To start, the columns should be labeled with date, subject and location (binder number or other locator). Once the initial phase is complete for the PJ's backlog, additional columns can be added to make searches more meaningful.
It's best to list the year, month and then date to sort the images in a logical order. Otherwise all images shot during the month of September for the last 20 years will be grouped together. Unlike standard American date notation (9/5/2004), computer notation (20040905) automatically sorts the files. The sorting software requires a "0" as a place marker for single-digit numerical information.
After the database is prepared, additional categories can be added or refined. Common additions include keywords, client(s), releases on file, cutline information, sales, markets, recording medium (film type or digital), awards won, etc.
Only add truly useful information to a database. If it becomes too complicated, it becomes less useful. For example, there's no need to add a "film type" column to every file if all files are shot on color negative film or digitally.
Each entry must be made manually on a personal database. However, the PJ can select cells in a column and "fill down" (add the exact same data to all selected cells). This is helpful while setting up the initial database where lots of repetition is required. Although it's good to have complete information in each file, be careful not to water down specific information.
When PJs need a specific image of a specific football player, they don't need to look at every football game ever played. Instead, include team names and locations to help narrow the search at a later date.
On big digital systems, each image is embedded (infused) with all assignment information as well as generic cutlines. The completed (press-ready) images have specific cutlines. This allows anyone to recover any image from the take and use it at a later date.
This requires humongous storage capacity and the computer power to search for multiple keywords quickly. Since a staff PJ might be in an African jungle at the time an image is needed, this is important.
It may also be important for PJs to explain their personal coding system to a spouse or other relatives. The images may be the best legacy a PJ leaves behind. If the family doesn't understand the archive's value or how to access images, the images become useless and may end up in the local landfill.
Electronic stock images
When stock photography involved prints, it was too expensive for PJs to have every good image printed and ready to ship to multiple clients. Digital imaging has changed the cost involved as well as the turnaround time.
PJs can prepare images for publication (color corrections and cutlines) between assignments and during other "down time." Once an image is ready digitally, it's forever ready. It can be sent as an unsolicited image to several image buyers, or it can wait as ready stock (the client calls, and 10 minutes later they have the image they need).
For single or small-group PJ activities, create a separate database for completed images. The point of this database is to locate and sell specific marketable images. The PJ has already edited and invested preparation time in these images. They should be the best images and should be published and profitable.
As these images are completed, store them in one folder on the hard drive. When the folder size nears the storage capacity of a CD, burn the CD and label it with the burn date. This date becomes the de facto file number in the archive. The images on the CD will always be the same and the date (file number) will not change. File these CDs separate from the general archive for easy retrieval.
Unlike the master database, this database only addresses completed images. The entries should be comprehensive and include specific cutlines. It should also contain terms from previous sale agreements (the exact date it's available for resale in a market), where it was sent as an unsolicited image and other exact information pertaining to each specific image.
Enough for now,
 
Wednesday, October 06, 2004
Organizing an archive
I’m sure people at camera stores hate to see me walk in. I’m not exactly a demanding customer, but I know precisely what I want. First, I want 36-frame rolls of film. I also want my film developed, cut into 6-frame sections and placed into negative sleeves. I frequently do not want any prints. I want my negatives this way because I already have an archival system for my images.
Negative sleeves
If a PJ is serious about pulling an archival system together, they need to protect and organize their film. For 35mm shooters, I suggest using Print File 35-6HBs.
I like Print File because they are designed for archival use. There are several hard plastic negative sleeve products, but I’ve found many of those will stick to the film if they are not stored in perfect humidity. I also have a hard time fitting the negs into and removing the negs from the hard plastic sleeves. For the one or two cents difference, give the negatives a break and get them decent sleeves.
I also prefer the 6HBs over the 7B. The 7B (5 frames x 7 rows) is preferred by photo instructors because it’s convenient to make 8x10 contact sheets. However, the 7B only holds 35 frames. The PJ must choose which frame to eliminate forever while the film is still in one piece or leave one frame hanging out to be destroyed. I don’t want any of my frames to become dust magnets or get scratches. Furthermore, I don’t need a contact sheet.
Most PJs shoot 36-frame rolls of film. The 6HB file holds 36 frames (6 frames x 6 rows). It’s a logical answer. If I squeeze my film and get 37 frames, it’s my choice, and I must live with the consequence.
Commercial processors will automatically cut film into four-frame segments. This is more convenient for them to fit into a standard envelope. This makes the PJ’s archive rather difficult to manage. I suppose a PJ could designate a special drawer or box for the envelopes, but I can’t see it working too well as an archive.
Instead, I keep a package of 100 sleeves I bought at the camera store. When I drop off film, I also drop off the same number of negative sleeves and explain exactly what I want. I haven’t had any shop refuse my request.
Label the sleeves
When the PJ picks up the sleeves, use an ultra fine point Sharpie permanent marker and immediately label the sleeve with the shooting date and subject. The Sharpie ink won’t smear or fade with time like other inks. Don’t wait a week because dates and places become fuzzy and require extra investigation. This information should be accurate enough to understand in a few years.
Although it’s best to shoot one general subject per roll, sometimes multiple assignments may appear on the same roll. As shorthand, I place a forward slash “/” between subjects shot on the same day and a double slash “//” between subjects shot on different days. I will also date the sleeve with a shooting range (10/1-3/2004) or separate the dates (10/1 & 10/3/2004).
If time allows, immediately edit with a regular Sharpie (bold-tip). Go though the negatives on a light table or box with a lupe and mark only the best frames with a single underline. Then, go through those frames again and draw a box around the absolute best frame or two on the roll. Additional crop lines can be drawn on the neg sleeve with a grease pencil or soft-tipped marker (a fine-tip could damage then neg).
In the old days, this was called the initial edit. It was done with a grease pencil. The neg sleeves were taken to the desk for a photo editor to select. The editor would put her/his initials on the frames to be scanned. Now it’s all part of the digital workflow, but this process is still helpful for personal archives.
If there’s one portfolio-quality or particularly valuable image on a roll, make a special notation on the top of the file and possibly put a star or some other mark near the frame. This will help during contest season when the PJ is frantically looking for great images on thousands of rolls of film.
Put it in a binder
Place the negative sleeves into a standard three-ring binder by shooting order. This adds an extra layer of organization and protection to the negatives. Use a huge, broad-tip marker and label the spine of the binder with a date range and possibly content separation (ie. Sports 7/2004 - 11/2004, Family 2/2004 – 11/2004). Leave the ending date open until the book is full. This will help locate the negatives at a later date. It will also let the PJ know the quality level of the images (everyone improves dramatically during the first few years and then makes subtle refinements over time).
If PJs are shooting several types of film or formats, they might separate these by binder colors. Personally, I use gray for B&W film, red for color film, blue for slides (chrome), and black for family. If I shot medium format film, I would probably use green binders (those images are worth more money). I keep 8x10 prints in archive sleeves inside white binders.
The same binder separations can be done with photo CDs, or they could have a color unto themselves. I personally use large CD binders with a zipper closure and four slots per page (8 including back of page). They allow enough room to securely keep the CD and additional cutline information in the same sleve.
All of these binders are on bookshelves in one specific place organized by binder color and date. It quickly eliminates options if the PJ isn't sure where an image is located.
Enough for now,
 
Tuesday, October 05, 2004
Tennis doubles
Mark M. Hancock / © The Dallas Morning News
Nimitz High School boys doubles senior Tam Bui (left) hammers a return against Irving High School during a team tennis match at Nimitz High School in Irving on Tuesday, October 5, 2004. Teammate senior Vinh Mai (right) waits for a return which never materialized. They beat their opponents and won the tie breaker 9-8 (7-2).
Flag corps
Mark M. Hancock / © The Dallas Morning News
MacArthur High School junior Kendra Malone performs during the 25th annual Irving Band Festival at the Irving ISD Schools Stadium in Irving on Tuesday, October 5, 2004.
Autumnal arabesque
This was a preview illustration for a group of local dance companies. They combined talents for a Fall Dance Festival. The dancing ranged from classical to cutting-edge and avant garde.
© Mark M. Hancock
Better illustrations are "timeless." They are as relivant in 10 years as they are today. This image is several years old, but the elements are still valid. I'd arrange and shoot it differently today, but it's still an adequate illustration of "fall" and "dance."
Save money with 36 exposures
Here's another infrequent money-saving photo tip for 35mm film shooters. Always shoot 36-exposure rolls.
If a PJ shoots 24-exposure rolls, they're wasting money and time. At a sampled dealer, a 24-exposure roll of Fuji film costs $1.79 (7.46 cents p/frame) while a 36-exposure roll of the same brand costs $2.09 (5.81 cents p/frame)*. The cost difference is 30 cents per roll (about 4 frames), so the PJ basically gets six free frames per roll with 36-exposure rolls.
It doesn't sound like much. But, when a PJ is accustomed to shooting seven to 10 rolls per day, it adds up quickly.
In reality, the PJ still fires at least 72 frames per assignment (two rolls of 36 or three rolls of 24). The real cost difference for the same number of frames is $1.19.
More importantly, the processing (or chemistry) fees are enormous. This is where the grocery stores – and even some camera shops – make the real money. They charge about $2 for each roll of film (12, 24 or 26 exposure) processed without prints. For each two rolls of 36-exposure film, the cost is about $4. For each three rolls of 24-exposure film, the cost is about $6. However, the same 72 frames have been shot. The PJ just lost $1.40 plus tax.
This also adds up when a PJ is accustomed to shooting 7 to 10 rolls per day.
Now is anyone wondering why some grocery and camera stores only sell 24-exposure rolls? They want to make a higher profit from PJs (above standard markup). The specific additional profit on each small assignment is $2.59. If PJs want to make a profit, they'll find the shops which sell 36-exposure rolls of film.
* For this comparison I used consumer film instead of professional press film. Press film at this same store cost $2.79 per 36-exposure roll. There is no such thing as 24-exposure professional press film because nobody would buy it.
Enough for now,
Saturday, October 02, 2004
A frightening Halloween
Mark M. Hancock / © The Dallas Morning News
A Zombie, played by Josh Sappington of Lancaster, (center) gives Jenny Forwark of Frisco (right) one last fright with a chainsaw as she runs screaming from the Slaughter House in downtown Dallas on Saturday, October 2, 2004.
Halloween is one of my favorite holidays. In addition to the colorful costumes, it's a chance to document raw emotions. I had to chase this young lady down the street and toward the parking lot to get her name.
Hoopin' for history
Frances Hitchcock, event chair of the Lancaster Historical Society's sock hop, keeps several hoops in motion during the event in the Lancaster Recreation Center gym in Lancaster on Saturday, October 2, 2004.
Mark M. Hancock / © The Dallas Morning News
Sapphire Room bartender
Robert Ramirez poses for a portrait at The Sapphire Room in Dallas on Saturday, October 2, 2004. He was the featured bartender of the week for a Hey Bartender feature story.
Mark M. Hancock / © The Dallas Morning News
Richard Avedon (1923 – 2004)
Richard Avedon was born in New York City in 1923. He was known for his revolutionary fashion photography, portraiture and documenting the civil rights struggle of the 1960s as well as the Vietnam war. He was also known as the world’s highest paid photographer.
He was a staff photographer at Harper's Bazaar, Vogue, Theatre Arts, Egoïste and The New Yorker. He had numerous exhibitions around the world.
He was the visual consultant for the film "Funny Face," which starred Fred Astaire and Audrey Hepburn and was based on Avedon's career. He was also involved in the American Masters Documentary program, "Richard Avedon: Darkness and Light" for PBS.
He finished life on assignment in San Antonio, Texas for New Yorker Magazine on October 1, 2004.
He wrote and/or photographed "Nothing Personal," "Alice In Wonderland: The Forming of a Company, The Making of a Play," "Portraits," "The Family," "The Sixties," Avedon: Photographs 1947-1977," "In the American West 1979-1984,"An Autobiography by Richard Avedon,"Evidence 1944-1994," "Richard Avedon: Made in France" and "Richard Avedon Portraits."
These books have won the Maine Photographic Workshop Nikon Award for the Best Photographer Book of the Year, National Magazine Award for Visual Excellence, and the Prix Nadar by the Bibliotheque Nationale for the best photographic book.
He was named by Popular Photography magazine as "One of the World's Ten Greatest Photographers," and Photo District News as the "Most Influential Photographer of the Last Twenty Years." He received lifetime achievement awards from the Columbia University Graduate School of Journalism, Council of Fashion Designers of America, The Alliance for Young Artists & Writers and Americans for the Arts.
The Art Directors Club of New York awarded him the Highest Achievement Medal award as well as placing him in The Hall of Fame. He has been an American Society of Magazine Photographers' Photographer of the Year, Adweek magazine's Commercial Television Director of the Year, Eastman Kodak's Commercial Television Director of the Year.
His awards include the Erna and Victor Hasselblad Foundation International Photography Prize, the International Center of Photography Master of Photography Award, Deutsches Centrum für Photographie, Berlin Photography Prize 2000, and the Royal Photographic Society, 150th Anniversary Medal. He also received the Mental Health Association of New York City, Humanitarian Award.
Additional images can be seen at RichardAvedon.com.
Enough for now,
Friday, October 01, 2004
Find PJ-related posts
I admit the blog format is not exactly the best way to read information presented. Consequently, below is a list of previous PJ-related entries. New links are added here as they happen. I hope this makes searching easier for different skill-level readers.
A good starting place is Welcome to PhotoJournalism. Feel free to drop me an e-mail or add a comment to request a topic not addressed below.
Frequently asked questions (term paper stuff)
Photography basics
iPhonography
Equipment
Work flow
Save money
Composition
Writing
Sports
How to...
Portraiture
Lighting
Ethics
Photoshop
Legal
Get a job
Finances
Interviews
Biographies
Obits
General Photojournalism
Contests
Video Journalism
Citizen Journalism
Everything else
Frequently asked questions (all FAQ)
Welcome to PhotoJournalism 22 Nov. 2005
What's a photojournalist? 1996
High school research paper answers 15 May 2007
Pass the baton 8 Sept. 2008
Quick tips to improve your photography 4 April 2008
Major photography fields 23 June 2006
Best PJ universities and recruits 08 18 Nov. 2008
Best PJ universities and recruits 07 12 Nov. 2007
Best PJ universities 2006 5 Dec. 2006
The best PJ universities 26 June 2006
Answers to tough PJ questions 27 Nov. 2004
College PJs should know this 12 July 2005
Read the Big Picture interview 15 March 2005
Suggested reading and gifts for PJs 18 Dec. 2005
How I started in PJ 24 Oct. 2003
What is a photo librarian? 27 Feb. 2004
I'm the other one 6 Oct. 2003
Consider PJ's future 11 May 2007
Understand newsroom problems 14 Oct. 2008
(Back to top)
Photography basics (all basics)
The PJ Quiz 1 Jan 2008
Primary educator's intro to PJ 17 Oct. 2006
Common ground starts here 9 July 2004
Basic photography rules are simple 14 July 2004
Primary education photo lesson plan 19 Oct. 2006
What's an ISO? 1 April 2007
Adjust speed for focal length 15 Aug. 2004
What is focus? 17 Nov. 2004
Look down before shooting 26 July 2004
Eliminate camera shake 8 Jan. 2004
You can't see what you shoot 13 Oct. 2003
How light meters work 26 Aug. 2004
Meter the light 27 Aug. 2004
Double check exposures 29 Aug. 2004
What's depth of field 29 Nov. 2004
How to calculate Exposure Values (EV) 16 Aug. 2004
What is Push and Pull 30 Aug. 2004
Use decent filters, not tricks 14 Aug. 2004
What is style? 15 Aug. 2006
Consider commercial photography 28 Aug. 2006
(Back to top)
iPhonography
iPhonography 101 - camera 14 May 2019
iPhonography 101 - editing 20 May 2019
iPhonography 101 - storage 26 May 2019
(Back to top)
equipment
Equipment(all equipment)
The PJ Candy Store 6 March 2007
Seasonal shopping solutions 23 Nov. 2007
Graduating PJs need these toys 21 May 2004
Quality is all in the lens 10 Aug. 2004
Cool toys of the job 28 Nov. 2003
What's in the trunk? 5 April 2004
Look cool with lens shades 1 Aug. 2004
How PJs deal with rain 12 Sept. 2004
Feds require roadside vests 30 Oct. 2008
Wear a hat 7 May 2004
Have a crisis "Go" bag 7 Sept. 2008
Cars must be legal at all times 10 Oct. 2003
Clean digital SLR camera sensors 11 Feb. 2006
And you're waiting for what? 27 March 2007
(Back to top)
Work flow (all work flow)
How photo requests work 24 Feb. 2004
Get flash cards in order 15 Feb. 2005
How the PJ editing process works 9 Nov. 2003
Create a personal digital workflow 15 Jan. 2005
Organize an archive 6 Oct. 2004
Make an archive useful 8 Oct. 2004
Set up a database 17 Jan. 2005
How professional digital work flows 9 Jan. 2005
(Back to top)
Save money (all save money)
Emulate a Web site with Blogger 27 July 2007
Go garage saleing for bargains 31 March 2007
Work holiday sales 2 Nov. 2008
Save money with 36 exposures 4 Oct. 2004
Save money with a film puller 25 Aug. 2004
A penny saved... 17 Oct. 2007
(Back to top)
Composition (all composition)
Address basic composition 24 March 2006
Images start with backgrounds 24 June 2007
Full frame PJ 7 March 2006
Have dark corners 13 Nov. 2004
Make clean images 14 June 2007
Make strong skeletal structures 8 Nov. 2004
Use the Golden Ratio 6 March 2006
Where to crop 17 Dec. 2004
To tilt or not 29 Jan. 2005
Let's talk tangents 3 July 2007
Optically center framed images 24 Feb. 2005
Recent discussions applied 4 July 2007
(Back to top)
Writing (all writing)
How to write a cutline 10 July 2004
PJs should write 30 Sept. 2004
How to write 9 Jan. 2004
People's names are important 23 Sept. 2004
How to tell a story 26 Aug. 2007
If it's not a scream, don't use it 12 April 2004
A title is not entitled 12 April 2004
Use names in police stories 19 Jan. 2005
How to prepare and submit a press release 21 Nov. 2003
My text editing background
(Back to top)
Sports (last 20 PJ sports)
Get the safe shots 10 Aug. 2004
How to handle "Media Day" 5 Aug. 2004
Shoot sportraits 20 March 2005
How to shoot football - Part I 17 Aug. 2004
How to shoot football - Part II 18 Aug. 2004
How to shoot volleyball 11 Aug. 2004
How to shoot basketball 06 Nov. 2004
How to shoot soccer (futball) 2 Aug. 2005
How to shoot baseball and softball 10 April 2006
How to shoot fast-track auto races - Part I 19 Oct. 2004
How to shoot fast-track auto races - Part II 26 Oct. 2004
(Back to top)
How to... (all how-to)
Plan for weather changes 11 Dec. 2005
Hunt wildlife with a camera 1 Aug. 2006
Cover elections 13 March 2006
There's more than fireworks on the 4th 1 July 2004
First two songs, no flash 15 June 2004
Restaurant review photographs 29 Oct. 2003
Cover hurricanes 20 Oct. 2005
PJs are problem solvers 16 Feb. 2006
Visual problem supplies 21 Feb. 2006
Visual problem solutions 27 Feb. 2006
Include monitors in the frame 1 Jan. 2005
How to shoot holiday lights 19 Dec. 2007.
Embed SoundSlides onto blogs 10 July 2007.
(Back to top)
Lighting (all lighting)
Use the dynamic range 12 Oct. 2004
Understand basic flash exposure 28 Nov. 2005
Eliminate red eye 19 Dec. 2004
Soften artificial light 18 Nov. 2004
Turn down the light 18 Dec. 2004
Balance the light 28 Dec. 2004
Behold "The Beast" 19 March 2005
Sometimes it's too fast 28 Feb. 2005
(Back to top)
Ethics (all ethics)
NPPA modernizes its Code of Ethics 18 July 2004
NPPA "Best Practices" 8 Feb. 2005
Develop a personal code of freebie ethics 8 Sept. 2006
Image manipulation is a global problem 21 June 2009.
PJ ethics during convergence 18 June 2008
The difference between news and posed photos 2 Nov. 2003
PJs are humble 29 March 2004
Tolerance is required 4 March 2004
Repercussions of a PJ's actions 13 Nov. 2003
Dit Manip - Don't do it 23 July 2004
NYT admits errors 26 May 2004
Mirror editor is fired 14 May 2004
The year of the liars 19 March 2004
Detrich damages Blade's rep 20 April 2007
Spiderman and PJ ethics 7 May 2007
NFL wants PJs as unpaid billboards 21 July 2007
No words suffice 9 Oct. 2008
(Back to top)
Photoshop (all Photoshop)
Photoshop hints can save some screams 13 June 2004
Photoshop CS2 & CS3 tips 4 Aug. 2008
Photoshop Shape tool tips 27 Dec. 2005
Add text to images 28 July 2004
Make a digital illustration 15 May 2005
(Back to top)
Legal (all legal)
"Know Your Rights" (ACLU) 02 Oct. 2011
Know your rights 14 Feb. 2005
U.S. v. U.K. libel laws 10 Oct. 2008
Don't sign access contracts 8 April 2006
Get model releases 12 April 2007
Don't get Orphan Works apathy 19 Sept. 2008
Basic VJ copyright 15 March 2008
Media boycotts Australian cricket 7 Nov. 2007
"Orphan Works" action needed 16 March 2006
Sign the Orphan Works petition 21 Nov. 2006
When can a newspaper be closed? 8 April 2004
Editorial is editorial only 10 April 2004
Reasons for distrust 7 Dec. 2006
Avoid anything Nygard 9 Dec. 2006
(Back to top)
Get a job (all get a job)
Getting started in PJ 21 Jan. 2004
How to get a PJ job 24 May 2004
How to make portfolios 19 Sept. 2004
Get business cards 1 Feb. 2005
Where to find PJ jobs 10 May 2005
Create a job hunt database 16 Aug. 2005
Research Newspaper Circs 12 May 2005
Make a resume 21 Aug. 2005
Make a cover letter 22 Aug. 2005
Complete the application package 23 Aug. 2005
Get stringer gigs 17 Aug. 2005
Negotiate a good staff deal - Fixed costs 18 Sept. 2005
Negotiate a good staff deal - Variable costs 20 Sept. 2005
Transition from staff to freelance 3 Dec. 2008
(Back to top)
Finances (all finances)
Use Assignment Confirmation forms 2 Dec. 2007
How to make invoices 29 Oct. 2006
What’s PJ worth? 15 Sept. 2004
PJ is a write off 16 Oct. 2007
Consider a PJ's minimum price 8 March 2005
Apply the minimum fee 9 March 2005
Consider the Cadillac theory 25 Feb. 2005
Understand billing schedules 2 March 2005
Budget for three months 16 April 2006
A penny saved... 17 Oct. 2007
Manage your money 17 April 2006
PJ accounting tips 19 Feb. 2005
Documents to give CPAs 20 Feb. 2005
A PJ geek's income 16 Oct. 2007
Collect the invoice payment 18 Nov. 2006
Get insured 26 June 2008
(Back to top)
Interviews (all interviews)
Tim Hussin interview - Part C - 24 Dec. 2008
Tim Hussin interview - Part B - 23 Dec. 2008
Tim Hussin interview - Part A - 22 Dec. 2008
Michael Rubenstein interview - Part B - 12 Dec. 2007
Michael Rubenstein interview - Part A - 11 Dec. 2007
Travis Dove interview - Part C - 24 Nov. 2007
Travis Dove interview - Part B - 23 Nov. 2007
Travis Dove interview - Part A - 22 Nov. 2007
Ken Burns interview 19 Oct. 2007
Wyman Meinzer interview 19 April 2007
Matt Eich interview - Part B 13 Dec. 2006
Matt Eich interview - Part A 12 Dec. 2006
Denis Delestrac interview 26 Sept. 2006
Jeremy Lock interview 20 Aug. 2006
Casey Templeton interview - Part B 11 July 2006
Casey Templeton interview - Part A 10 July 2006
Todd Heisler interview - Part C 24 May 2006
Todd Heisler interview - Part B 23 May 2006
Todd Heisler interview - Part A 22 May 2006
Michael Ainsworth interview - Part B 3 May 2006
Michael Ainsworth interview - Part A 2 May 2006
Fayrouz interviews David Leeson 13 Feb. 2006
Rick Gershon interview - Part B 6 Feb. 2005
Rick Gershon interview - Part A 5 Feb. 2005
David Leeson interview - Part B 28 Jan. 2005
David Leeson interview - Part A 27 Jan. 2005
(Back to top)
Biographies (all biographies)
Tim Hussin - 2008 CPOY winner 19 Nov. 2008
Michael Rubenstein 4 Dec. 2007
Travis Dove - 2007 CPOY winner 14 Nov. 2007.
Ken Burns - documentary filmmaker 19 Oct. 2007
Wyman Meinzer - State Photographer of Texas 18 April 2007
Matt Eich 2006 CPOY winner 6 Dec. 2006
Denis Delestrac IMAX director 10 Sept. 2006
Jeremy Lock 2005 Military Photographer of the Year 9 July 2006
Casey Templeton 2005 CPOY winner 25 June 2006
Todd Heisler 2006 Pulitzer Prize winner 21 May 2006
Michael Ainsworth 2006 Pulitzer Prize winner 1 May 2006
Rick Gershon: 2004 CPOY winner 3 Feb. 2005
David Leeson 2004 Pulitzer Prize winner 26 Jan. 2005
Mark M. Hancock 1 Dec. 2007
(Back to top)
Obits (all obits)
Gordon Parks (1912 - 2006) 7 March 2006
Richard Avedon (1923 – 2004) 2 Oct. 2004
Eddie Adams (1933 – 2004) 20 Sept. 2004
Henri Cartier-Bresson dies 5 Aug. 2004
(Back to top)
General Photojournalism (last 20 General PJ)
PJs require a background check 25 March 2004
Press pass misconceptions 16 Nov. 2003
Apply General Orders to PJ work 10 June 2007
PJ motivation 29 May 2008
PJs have a "life wish" 15 April 2008
Dead PJs don't make deadline 3 May 2008
Survive dangerous situations 15 May 2008
Have a crisis "Go" bag 7 Sept. 2008
Press journalists are not talking heads 11 Nov. 2003
No sick days for PJs 20 Oct. 2003
PJs must deliver 22 June 2004
Daily newspaper deadlines are hourly 1 June 2004
100 frames are required per assignment 10 June 2004
Images have power 13 May 2004
Have one in the bag 23 Aug. 2004
Find a new word 1 March 2004
PJs are initial responders 18 May 2004
Give and get a critique 7 Sept. 2004
Dissect imageless stories 8 Aug. 2005
Keep your focus 20 July 2004
Take pictures of signs and rosters 14 April 2004
Photograph the notes 10 July 2004
PJ time relativity 24 Oct. 2003
Make lemonade 25 May 2006
Art is frustrating 26 Dec. 2005
Riding the rocket is an uncomfortable rush 6 July 2004
Shooting for file 30 Oct. 2003
Invite PJs to your next party 28 March 2004
What sells newspapers 2 Jan. 2004
"You just missed it" 17 Nov. 2003
PJ is an unpredictable profession 7 Nov. 2003
PJ risks are too strange to explain 31 Oct. 2003
(Back to top)
Portraiture (all portraiture)
Work with the subject 14 July 2004
Gain trust for portraits 19 Nov. 2004
Turn one portrait into two 9 June 2005
Environmental portrait pop quiz 14 Jan. 2005*
Shoot sportraits 20 May 2005
Present portrait options 9 Oct. 2006
More layout options 26 Oct. 2006
Shoot for magazine layout 11 Nov. 2006
(Back to top)
Contests (all contests)
PJ contest calendar 19 Dec. 2006
NPPA clip contest goes dit 27 Jan. 2008.
Enter NPPA monthly clip contests 23 May 2007
How (some) NPPA clip contests are judged 5 Feb. 2007
How to submit NPPA clips 29 May 2007
It's contest season 27 Jan. 2004
Photo puppies 16 Feb. 2004
WHNPA enforces contest rules 12 Feb. 2005
Just to ruin the holidays 21 Dec. 2004
The year of the liars 19 March 2004
Online petition seeks BOP and POYi reunification 7 April 2004
(Back to top)
VideoJournalism (VJ) (last 20 of VideoJournalism)
Choose the right video editing software 30 Oct. 2007
The video ship is sailing 5 May 2007
Basic VJ copyright 15 March 2008
David Leeson interview 27 Jan. 2005
Embed SoundSlides onto blogs 10 July 2007.
(Back to top)
Citizen Journalism (CJ)   (last 20 of Citizen Journalism )
What's "replacing" PJs? 12 Feb. 2007
CJ likes TV too 20 Feb. 2007
Surface computing could change newsrooms 30 July 2007
E-Newspapers may become reality in 2009 16 Oct. 2008
(Back to top)
Everything else (last 20 of everything else)
Present portrait options 9 Oct. 2006
More layout options 26 Oct. 2006
Shoot for magazine layout 11 Nov. 2006
How PJ affects the brain 30 Nov. 2006
Understand PPI, DPI and LPI 12 Feb. 2010
Submit photos for publication 9 July 2011
Recognize photo clumps 17 Dec. 2006
Categorize multiple photo groups 13 June 2008.
Neighbors in Need project 7 Sept. 2007
Future news could look like this 13 July 2004
Surface computing could change newsrooms 30 July 2007
Tornado season is coming 5 March 2005
Tornados are a rush 2 June 2004
Paintball is good training for combat PJs 17 May 2004
PJs shoot weddings differently 9 Aug. 2004
Wedding PJs beware 20 Sept. 2004
Select the right clothes 24 July 2004
Be careful with cell numbers 24 July 2008.
PJ use on Web questioned 5 July 2004
Most clocks have happy hands 13 Aug. 2004
How to order prints 4 Aug. 2004
How to order Beaumont Enterprise images 21 April 2005
Stop using AOL 14 March 2005
Exceptional people need clarification 25 June 2004
Avoid ghastly assignments 23 June 2004
We got an intern 16 June 2004
Don’t scratch! 8 June 2004
I got the lightning horses 3 June 2004
I want WiMax (or something like it) 9 May 2004
Some days don't work out 26 April 2004
Before you go, go 1 April 2004
CJR offers forces threatening PJ's 30 March 2004
Fat-o-journalists 19 March 2004
Good news for young PJs 7 Jan. 2004
Vacation with confidence 07 Oct. 2003
Look through life's viewfinder 16 Oct. 2006
Do we run pretty pictures? 6 Oct. 2007
Eschew negativity 25 Oct. 2003
The pony parable 22 April 2007
(Back to top)
Enough for now,
 
Subscribe to:
Posts (Atom)